
Passwords can be stolen more often than people think. A weak password, a reused one, or one that leaked in some other data breach is the easiest way into a WordPress site. That’s why more site owners are choosing to set up 2FA with authenticator app for WordPress login instead of relying on a strong password alone.
This guide walks through how two-factor authentication works with an authenticator app and how to set it up step by step.
Table of Contents
What Is 2FA?
Two-factor authentication, or 2FA, is a login method that asks for two different types of proof before letting someone in. The first factor is your password. The second factor is another verification that is only tied to you.
The idea behind it is simple. Even if someone gets your credentials, they still can’t log in without that second verification. WordPress supports a few different ways to handle that second factor, and this post focuses on one specific method: the authenticator app.
What Is 2FA With An Authenticator App?
The authenticator app is one specific way to handle that second factor. Instead of a text message or an email code, you use an app installed on your primary device, mostly your phone.
Once it’s set up, your password gets you through the first door, and a 6-digit code from the app gets you through the second. Your site and the app share a private key behind the scenes, so both sides can check that the code you typed in is the right one for that exact moment.
A Simple Way to Add Two-Factor Authentication With an App For WordPress Login
WordPress doesn’t include 2FA natively, so you need a plugin for it. Ultimate Security is a WordPress security plugin. It includes 2FA as one of its login protection features.
To get started Install and activate the plugin if you haven’t already. That’s where the real setup begins.
Two-Factor Authentication Settings Inside The Plugin
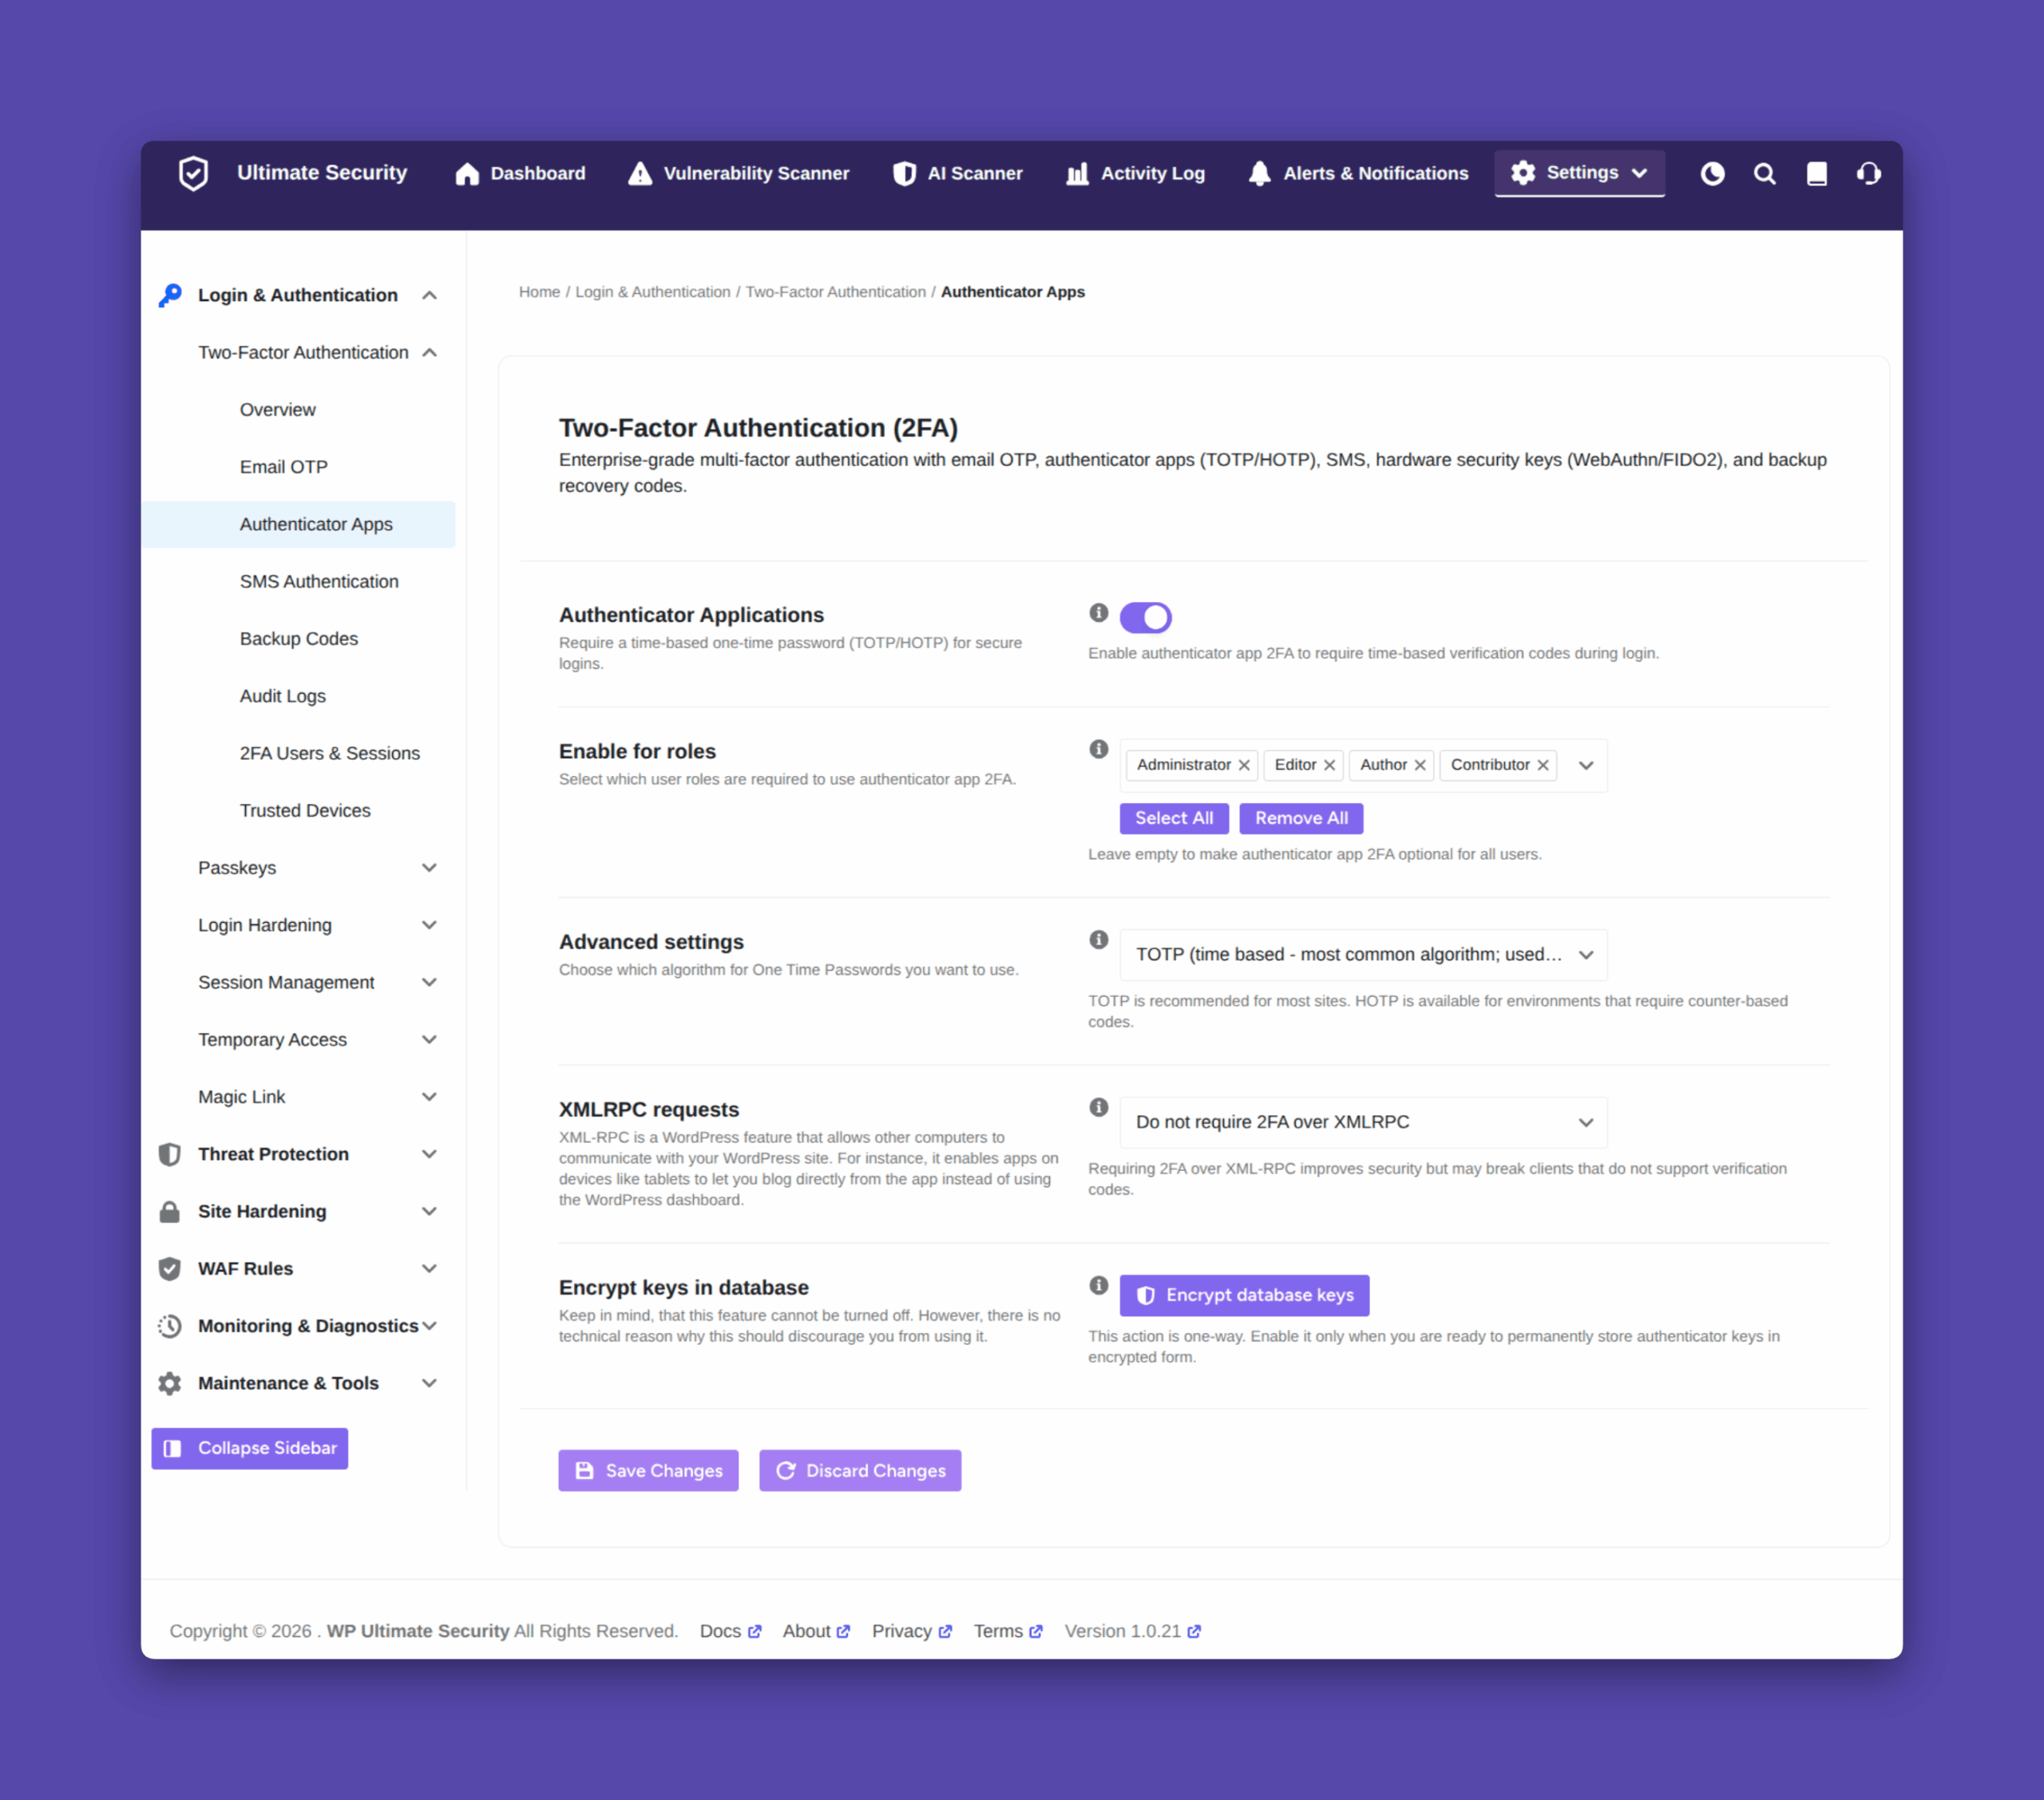
The 2FA settings live under the plugin’s “Login and Authentication,” and the Authenticator app settings start from here.
Enabling the Method and Choosing Roles
There’s a master switch that turns the Authenticator Application method on or off for the whole site. Right below it, you can pick which roles can use it.
TOTP vs HOTP: The Algorithm Choice
Under Advanced Settings, you’ll find a choice between two algorithms:
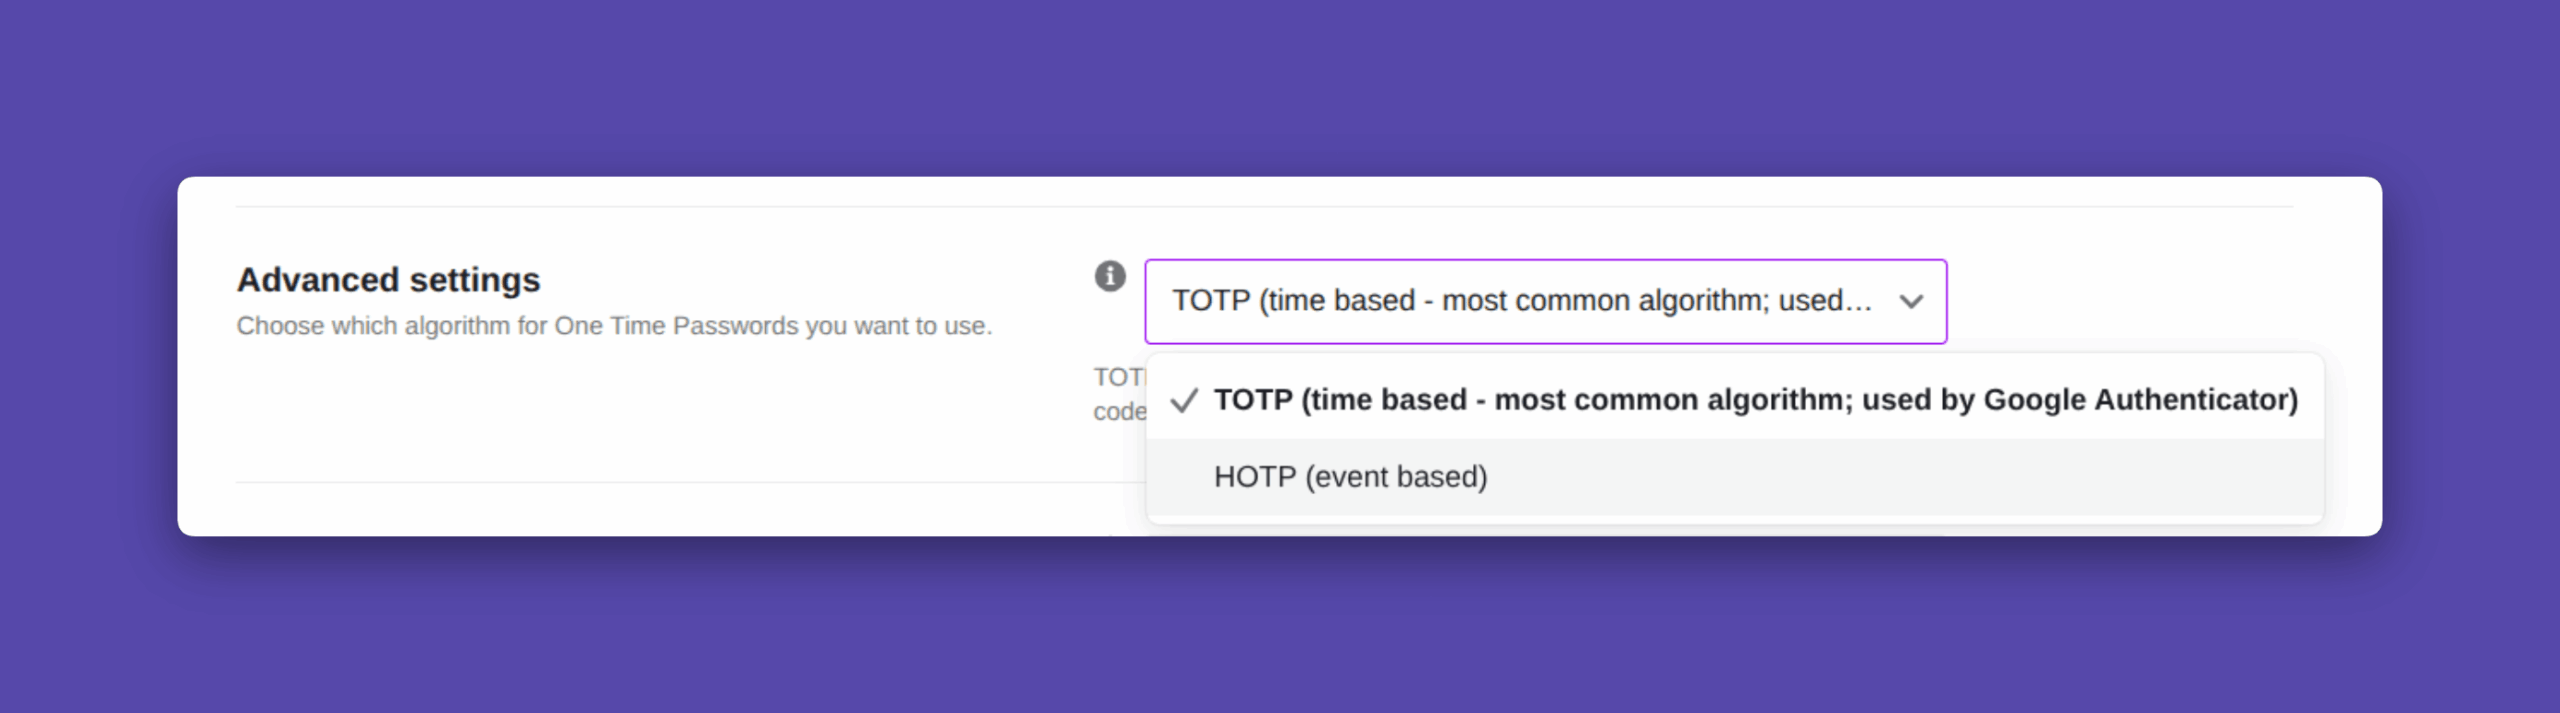
- TOTP (Time-Based): generates a new code every 30 seconds based on the current time. This is what almost every authenticator app expects, and it’s the default for good reason.
- HOTP (Event-Based): generates a new code only when something triggers it, like a login attempt, rather than on a timer.
Most people should stick with TOTP. It avoids any weirdness caused by clocks being slightly out of sync. HOTP exists for specific setups where a counter-based system fits better, but that’s a narrower use case than most sites will run into.
The XML-RPC Setting
XML-RPC is a feature in WordPress that lets outside tools, like mobile apps to communicate with your site remotely. Ultimate Security lets you decide how 2FA applies to those connections.
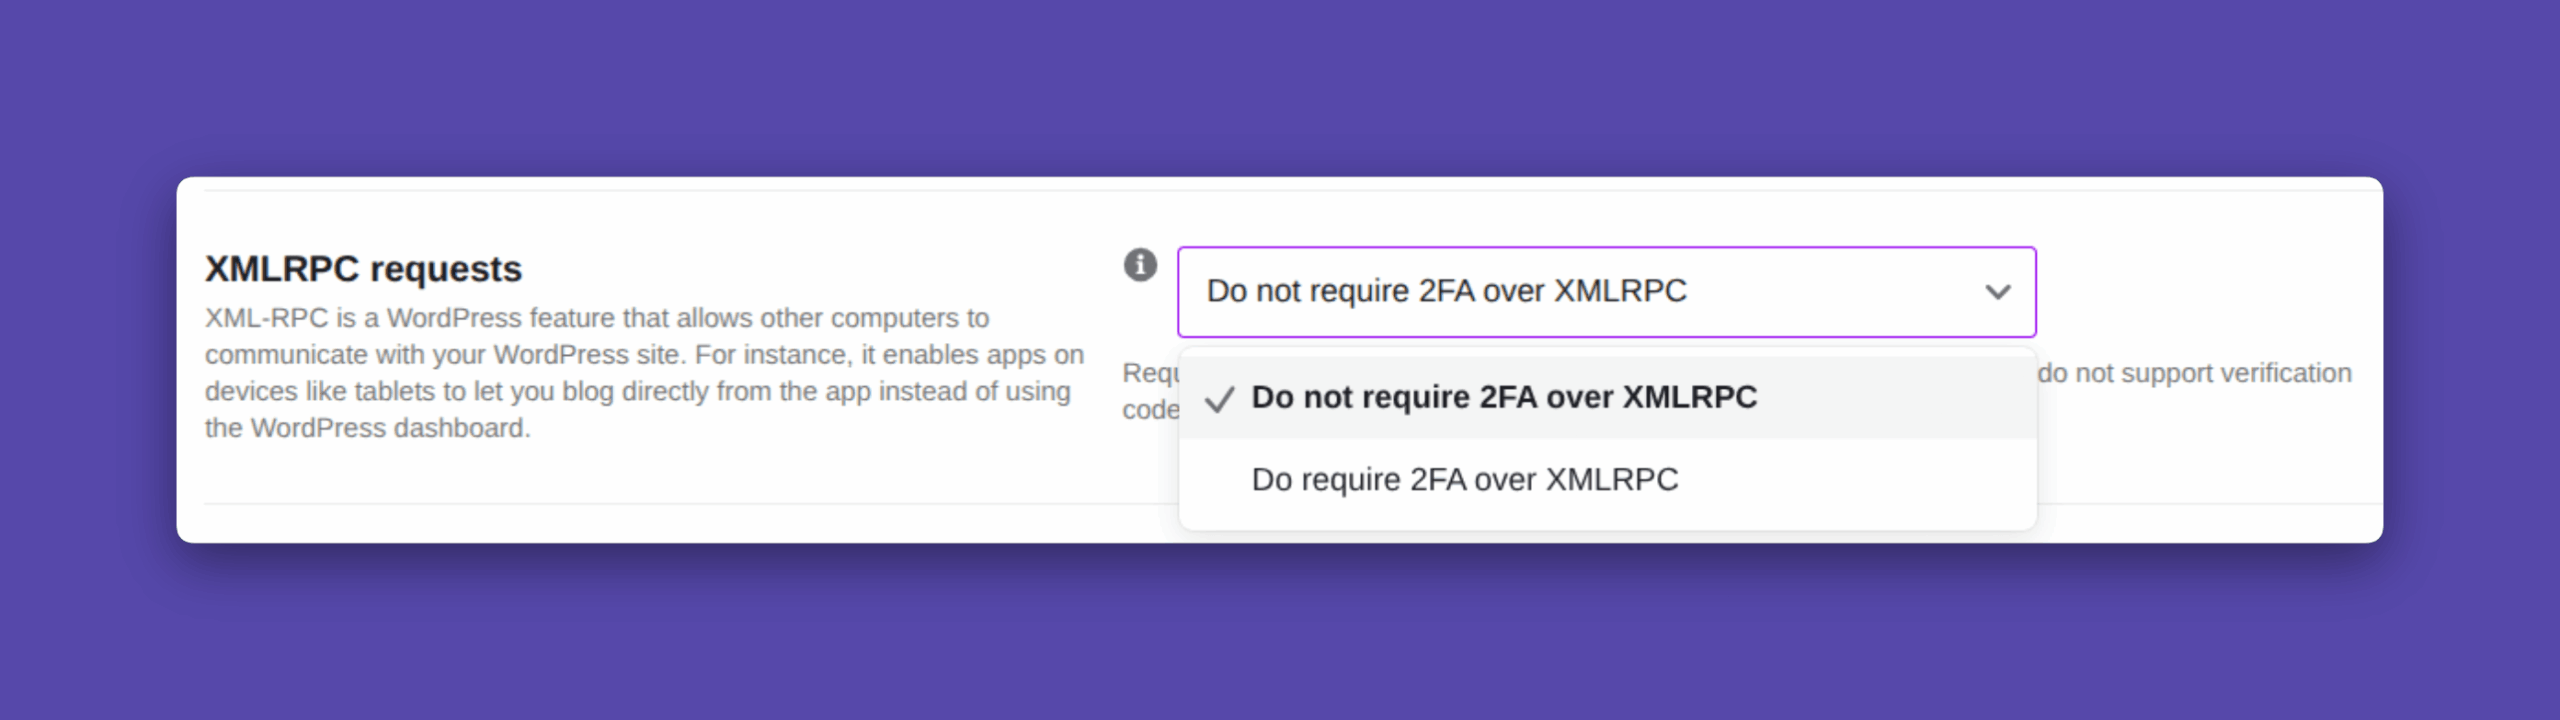
By default, 2FA is not required over XML-RPC. That means outside tools can still connect using just a username and password. You can switch this to require 2FA on XML-RPC connections too, but only do that if you’re sure every tool you use actually supports sending a 2FA code along with its login request.
Encrypt Keys in Database
This one is simple but important. Turning it on encrypts the secret keys tied to your 2FA setup, so even if someone got into your database, they couldn’t read or reuse those keys. Worth knowing before you click it: once this is turned on, it can’t be turned back off.
Read on here to know more about the authenticator app settings.
Set Up Two Factor Authentication With Authenticator App For WordPress
Once you’ve set up 2FA from the plugin. Now it’s time to learn how to get it running, step by step.
Before You Start
You’ll need one thing before anything else: an authenticator app installed on your phone or any device. A few solid, free options are:
- Google Authenticator (iOS and Android)
- Microsoft Authenticator (iOS and Android)
- 2FAS Authenticator (open source)
Any of these will work fine. Pick whichever one you’re already comfortable with, or whichever one your team already uses.
Open Your Profile Page
Log into WordPress, go to Users, then click Profile. Scroll down until you find the Ultimate Security section. This is where your 2FA security settings live.
Select the Authenticator Application Method
Inside the 2FA section, choose Authenticator Application. This opens the screen where the actual pairing between the authenticator app on your phone and your site happens.
Scan the QR Code
A QR code appears on screen. Open your authenticator app, and scan it. The app picks it up and adds your site automatically.
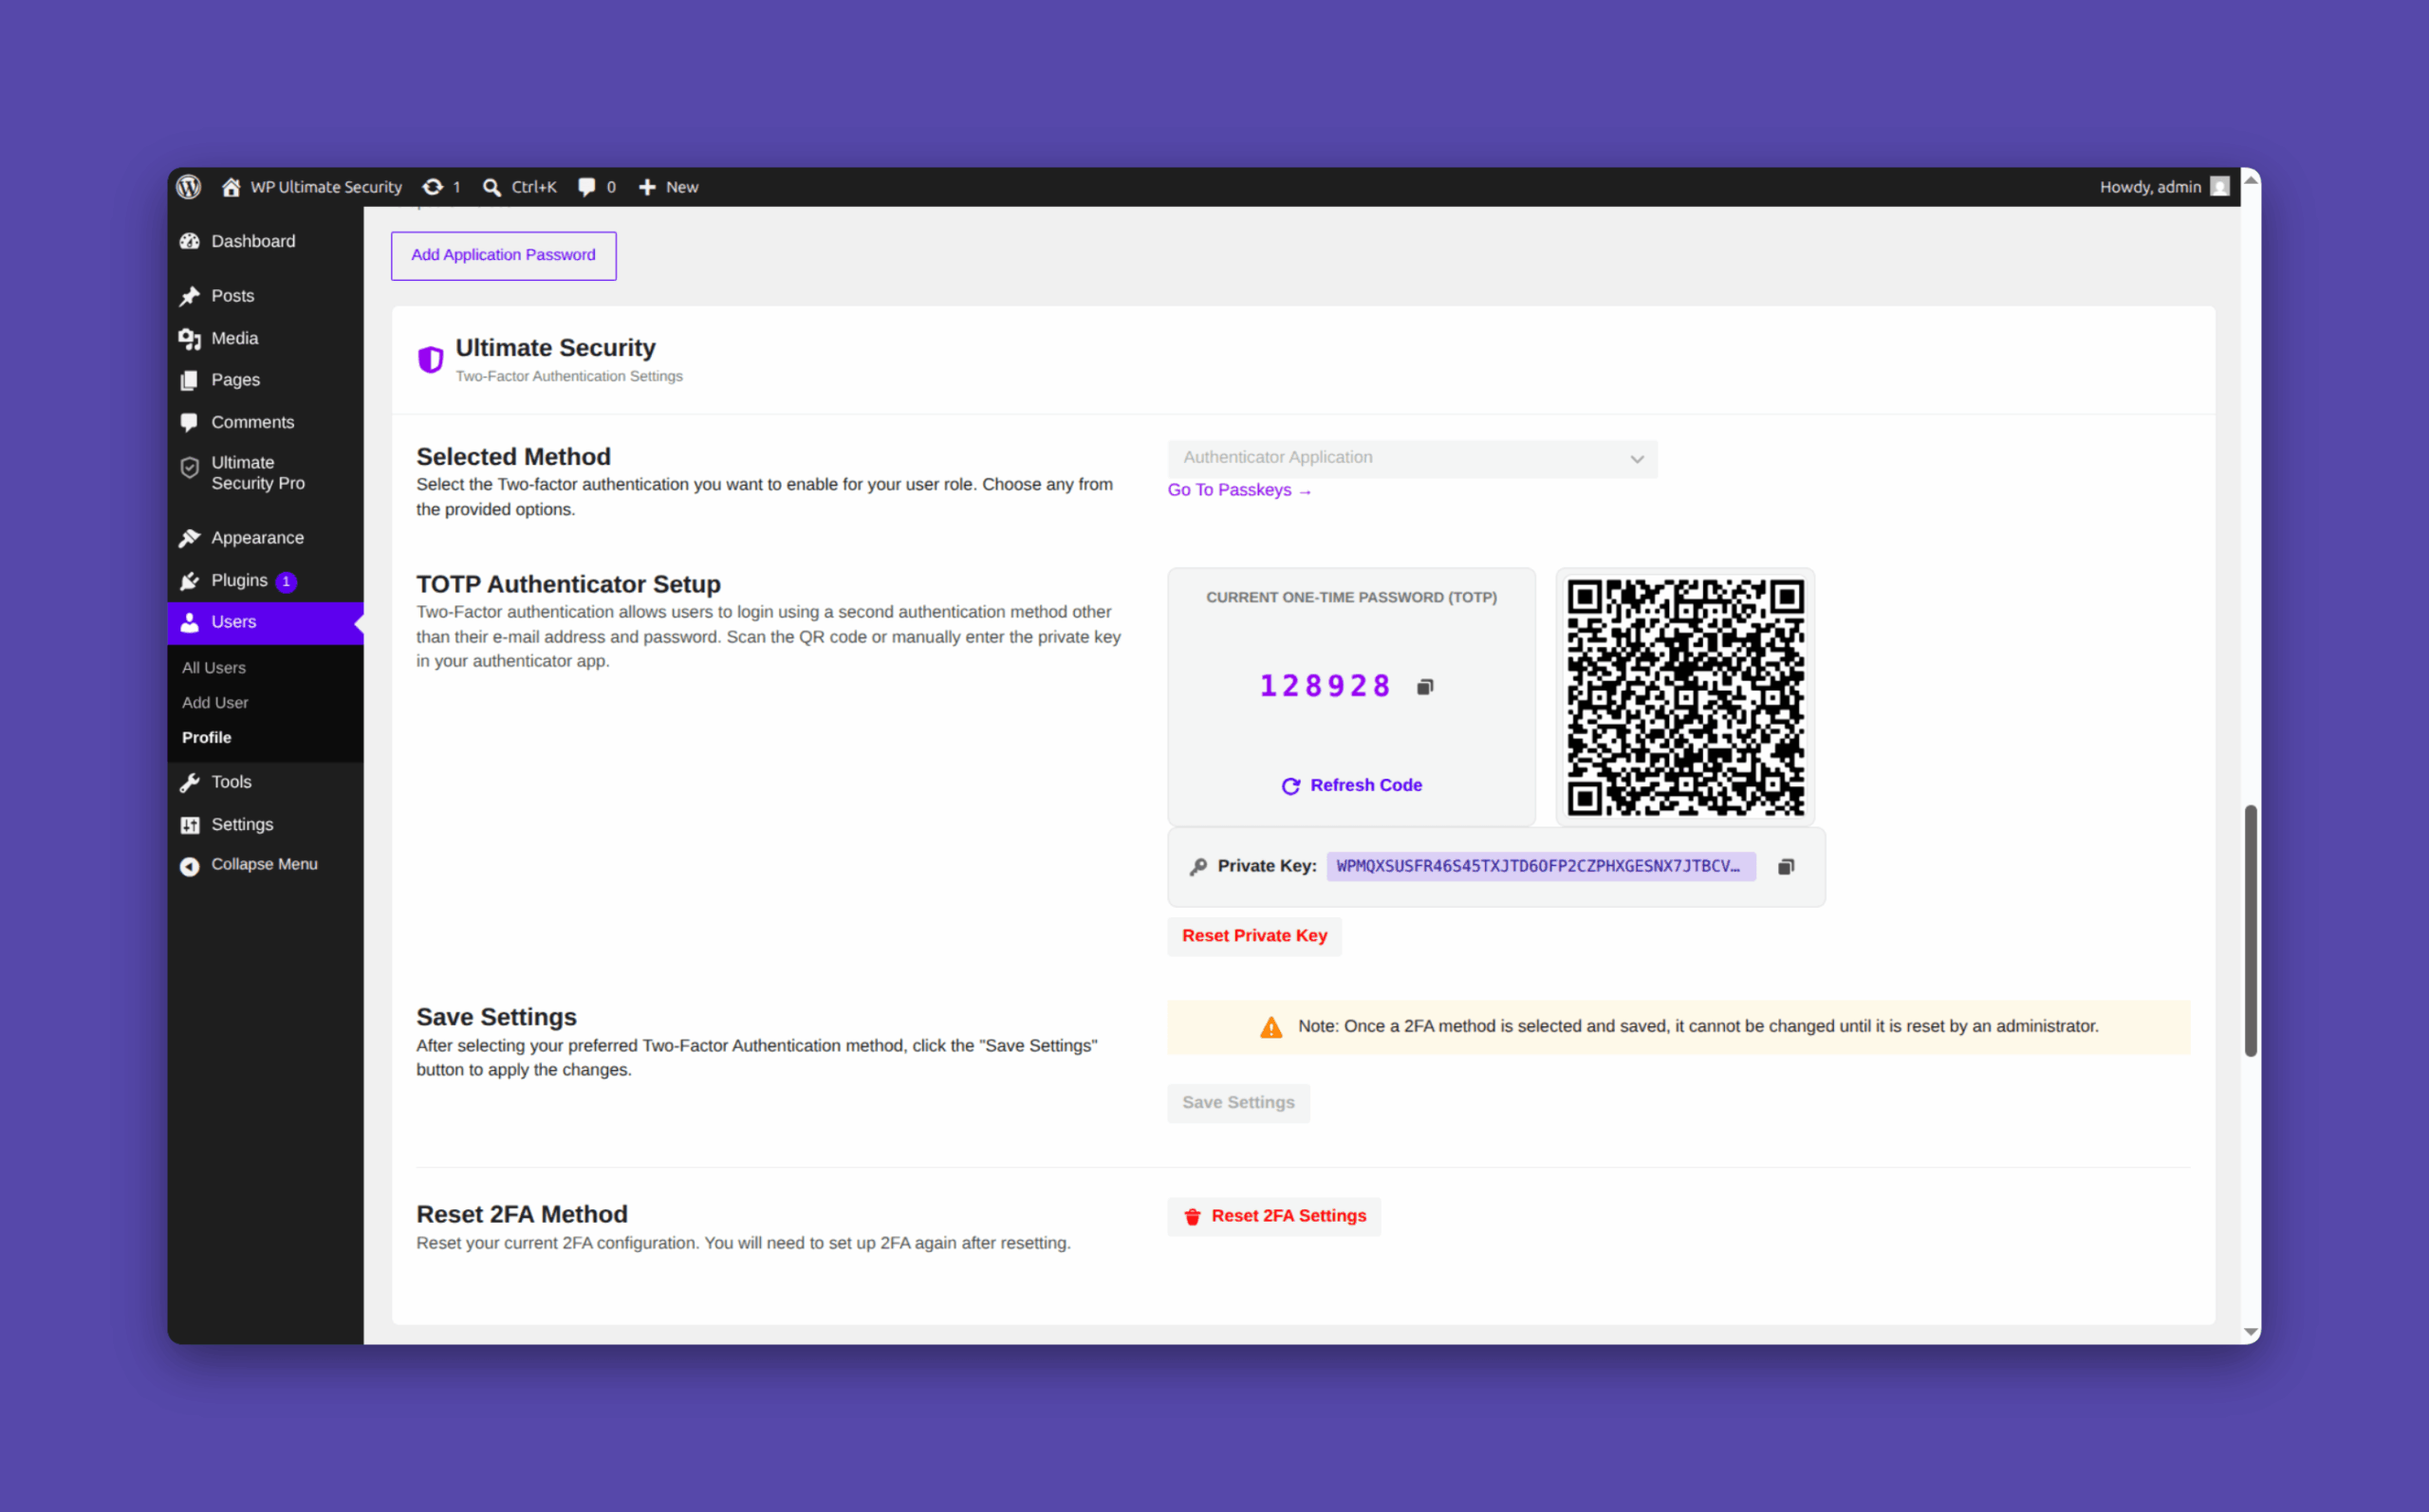
Also, you can copy the private key and paste it into the app. Same result, just typed instead of scanned. Click “Save settings” and your 2FA with authenticator app for WordPress is now live on your account.
What Login Looks Like From Now On
Next time you log in, you’ll enter your username and password as usual. Then a second screen appears asking for your code.
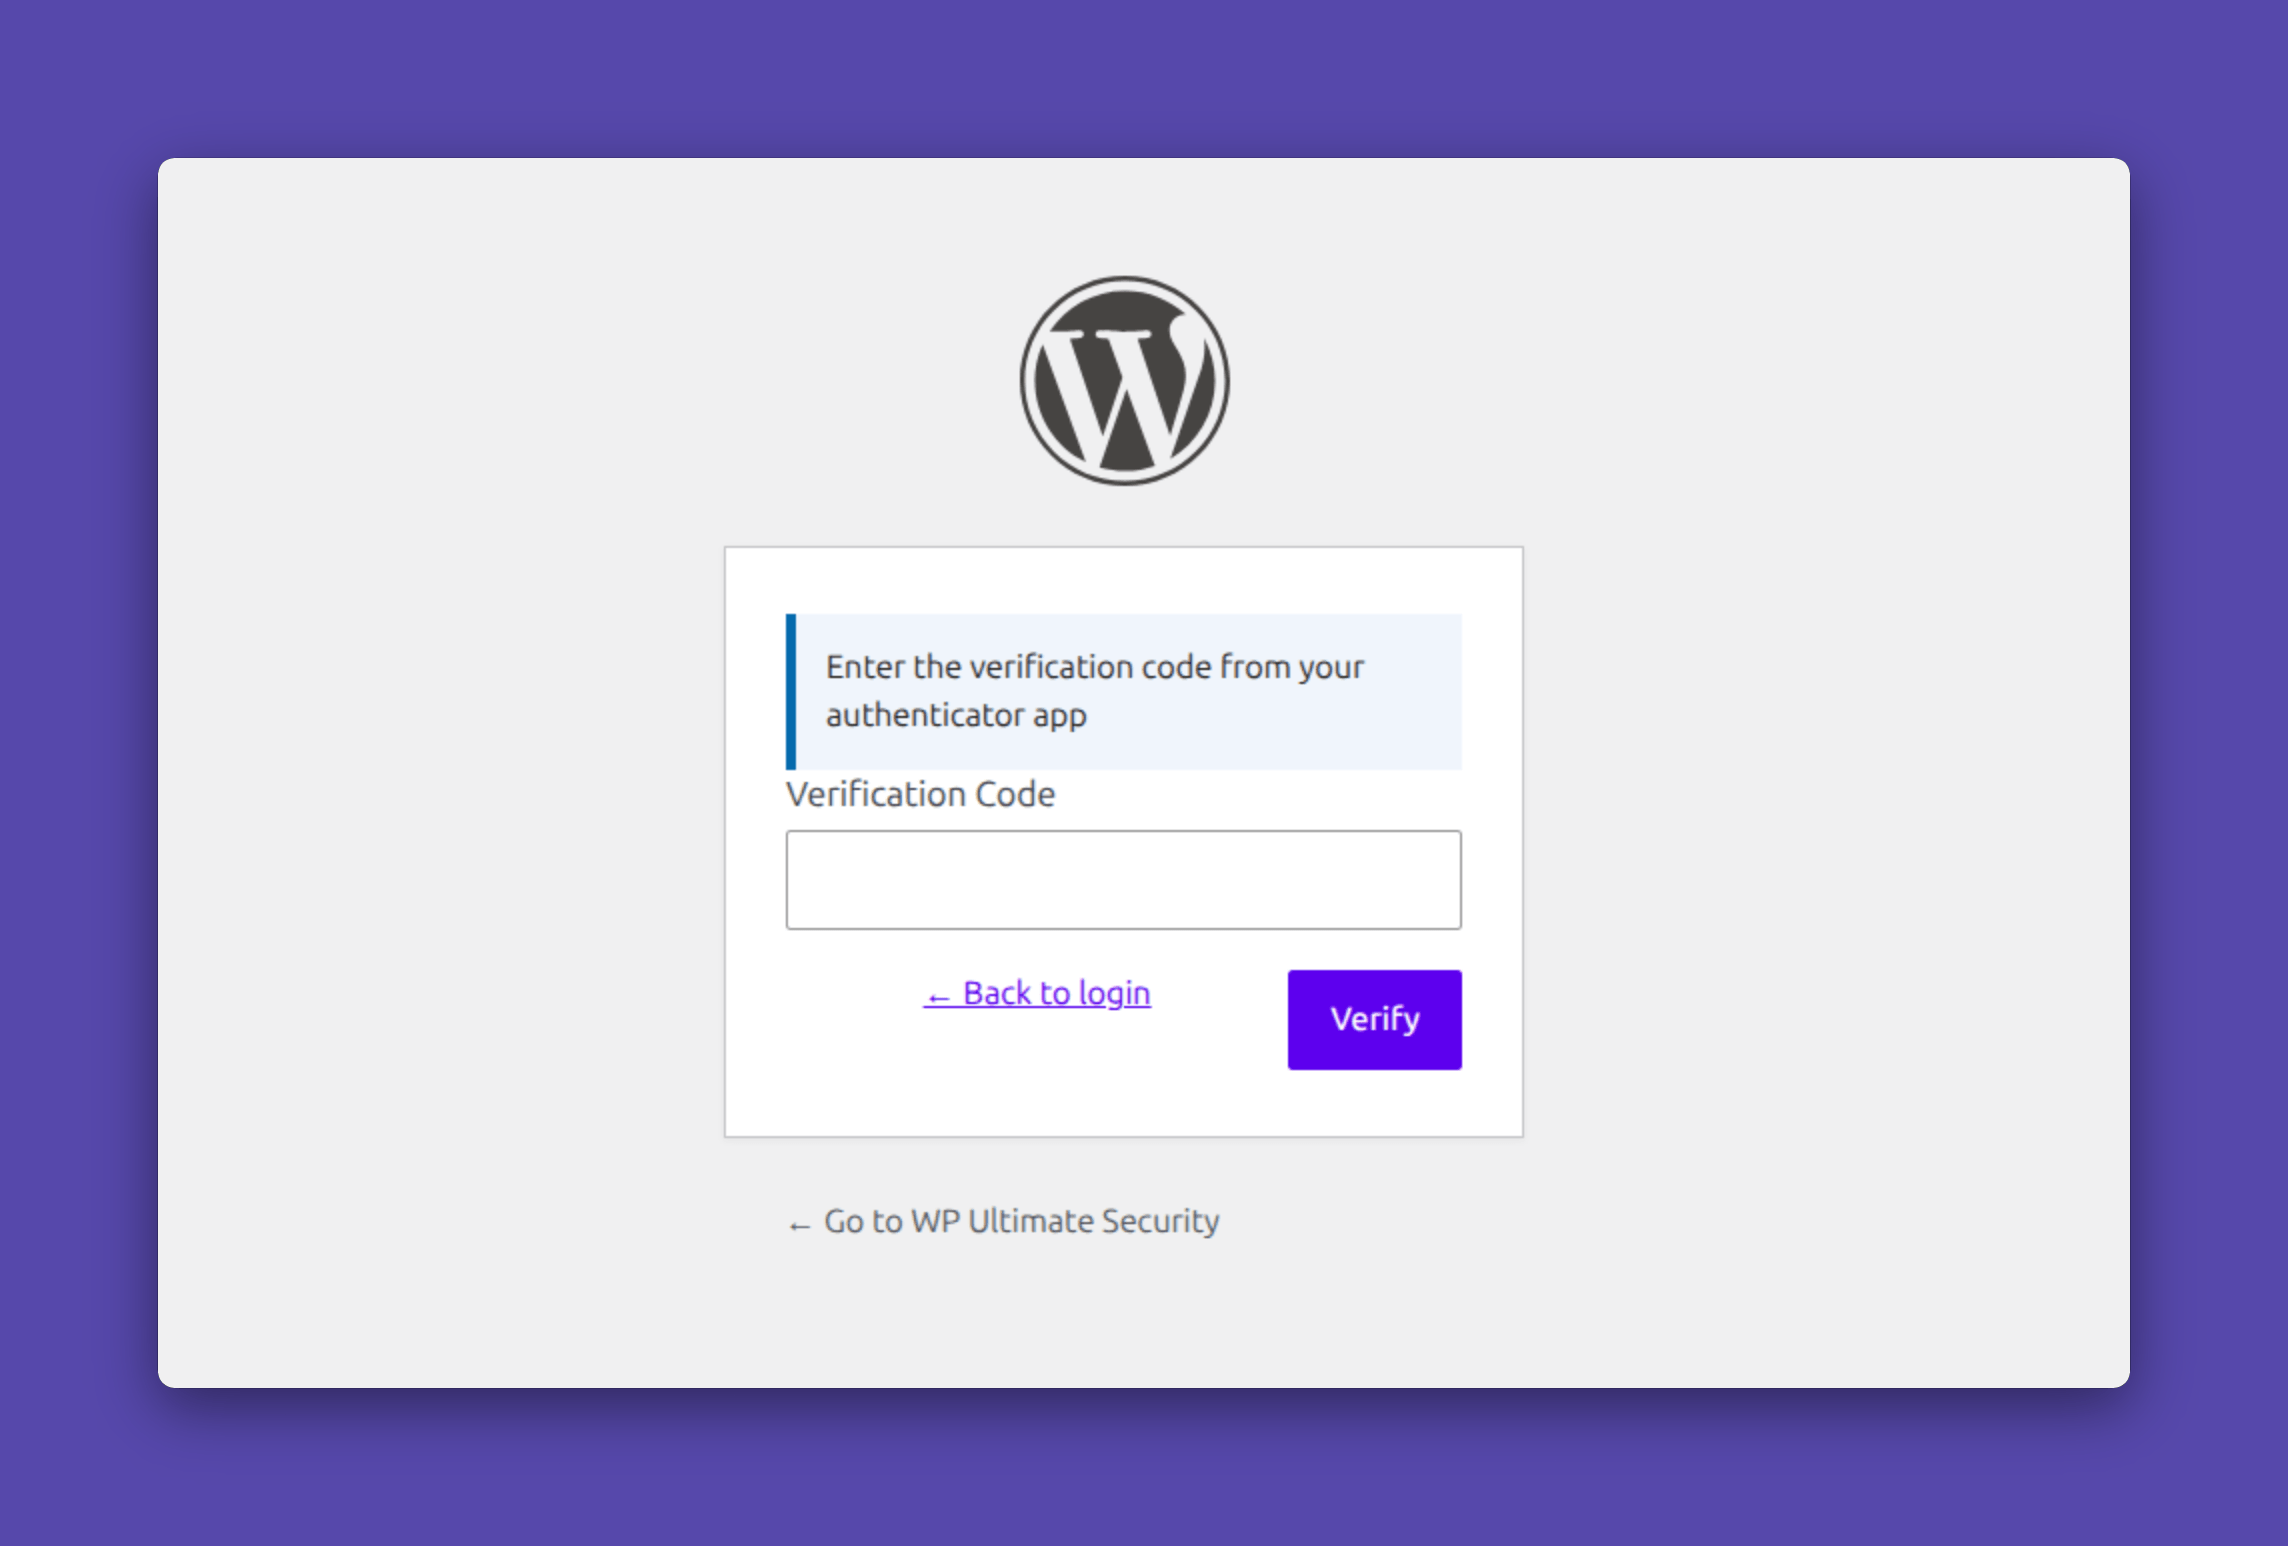
Open your app, find the code for your site, type it in before it refreshes, and you’re in. It adds maybe five extra seconds to your login. That’s a small price for cutting off one of the most common ways WordPress sites get broken into.
Beyond Two-Factor Authentication For WordPress Login Security
2FA with authenticator app for WordPress login security covers one part of your site’s security. It’s a strong part, but not the only piece worth having in place.
A few other settings pair naturally with what you just set up, and each one closes off a different way WordPress sites usually get broken into:
- Strong passwords. 2FA is only as useful as the password sitting in front of it. If your team is still using weak or reused passwords, our guide on how to force strong passwords for WordPress users walks through setting real requirements.
- CAPTCHA on your login form. Stops bots before they even get a chance to guess a password. If you’re deciding between the two common options, Turnstile vs reCAPTCHA for WordPress breaks down the difference.
- Login attempt limits. 2FA won’t stop a script from hammering your login page all day. Capping failed attempts does. Here’s how to limit login attempts on WordPress.
- A custom login URL. Moving your login page off the default wp-admin address keeps a lot of automated attacks from ever finding it. Our post on the best way to change your wp-admin login URL covers how to do this safely.
Before you go, here are a few quick answers to questions people usually have about this setup.
Frequently Asked Questions
What’s the difference between TOTP and HOTP?
TOTP generates a new code every 30 seconds based on the current time. HOTP generates a new code only when triggered by an event, like a login attempt.
Can different user roles have different 2FA requirements?
Yes. The authenticator app method has its own role selector, so you can require it for admins and editors while leaving other roles out of it.
Is turning on Encrypt Keys in Database reversible?
No. Once it’s enabled, it stays enabled. It’s a safe setting to turn on, just not one you can undo later.
Why does WordPress reject my authenticator code?
This almost always comes down to your phone’s clock being slightly out of sync with real time. Check that your device’s date and time are set to update automatically, and the codes should start matching again.
Does enabling 2FA slow down the login process?
Barely. It adds one extra screen and maybe five seconds to your login. That’s a small trade-off for closing off one of the most common ways WordPress accounts get compromised.
Conclusion
You started this guide because a password alone didn’t feel like enough anymore, and honestly, you were right to think that. 2FA with authenticator app for WordPress login security closes the exact gap a stolen or reused password leaves wide open, and it does that without making your daily login any real hassle. Once it’s set up, you probably won’t think about it again for a while. That’s kind of the point. It sits quietly in the background until one day someone tries to log in with your password and gets stopped cold at the code screen. Your site is already better protected than it was before you opened this guide. That’s a good place to stop.