
WordPress powers a significant portion of the internet. In 2026, cyber threats are more sophisticated, with automated bots relentlessly scanning for weaknesses. Because standard configurations are no longer enough to stop these threats, understanding and executing true WordPress security best practices has become a fundamental requirement to protect your website’s data.
This guide will walk you through essential steps to secure your WordPress website. You can follow every step here, and by the time you are done, your site will be significantly more secure than the vast majority of WordPress installations on the internet today
Table of Contents
Why WordPress Security Best Practices Matter More Than Ever in 2026
Every week, thousands of WordPress sites get compromised. Not because WordPress itself is poorly built. The core software is maintained by a dedicated security team and updated regularly. The real problem is the layer that sits on top: plugins, themes, hosting misconfigurations, and human habits.
How Attacks Actually Work
Many WordPress site owners have the misconception that a hacker is personally targeting their site. In reality, that almost never happens. What actually happens is automated.
Bots crawl millions of websites around the clock, scanning for the same handful of known vulnerabilities. When a plugin developer releases a security patch, they also publish a changelog that explains exactly what the vulnerability was. That announcement is, unintentionally, a roadmap for every bot running on the internet. Sites that have not updated yet become the targets. If your site has any of those unpatched doors open, a bot will find it. Usually within hours.
What Attackers Are Actually After
Understanding attacker motivation makes every security step in this guide make more sense. Here are the most common things that they want from your site:
None of these require you to be a high-value target. They are entirely opportunistic.
What a Breach Actually Costs
The consequences of a compromised WordPress site go beyond the immediate headache of cleanup.
| Consequence | Real Impact |
|---|---|
| Google blacklist | Traffic can drop overnight |
| Malware removal | Professional services cost $80–$500+ per incident |
| Data breach (GDPR) | Potential fines and legal exposure for EU visitor data |
| Lost content | Without backups, months of work can be gone permanently |
| Reputation damage | Visitors who see a security warning rarely come back |
The math on prevention versus recovery is not close. A few hours spent on your WordPress security setup is worth far more than the alternative.
Understanding the Three Layers of WordPress Security
Before diving into specific steps, let’s understand how WordPress security actually works. It is not one monolithic thing. It operates across three distinct layers.
Layer 1 WordPress Core: WordPress itself is updated regularly by the core team. Security vulnerabilities in the core are patched quickly and pushed as updates. Keeping WordPress core updated is the simplest and highest-leverage security action you can take.
Layer 2 Plugins and Themes: This is where most breaches actually happen. Plugins and themes are developed by thousands of different teams with varying levels of security expertise. When a vulnerability is found, responsible developers patch it, but that patch only protects you if you have installed it. Outdated plugins on your site are active attack surfaces.
Layer 3 Hosting Environment: This layer covers your server configuration, PHP version, firewall settings, and file permissions. Many WordPress site owners never touch this layer. It is also the layer that attackers reach for when the others are locked down.
Choosing the Right WordPress Security Plugin
You do not need five security plugins installed simultaneously. In fact, running multiple competing security plugins can cause conflicts and slow down your site. What you need is one well-configured plugin that covers the essential bases.
Using WordPress Ultimate Security
Ultimate Security covers the essential areas in a single plugin and goes beyond them. Its feature set includes the “Refuse Compromised Passwords” module, which checks submitted passwords against known data breach databases so users cannot set passwords that have already been exposed. The session management system gives you visibility into active sessions and lets you terminate them individually or globally.
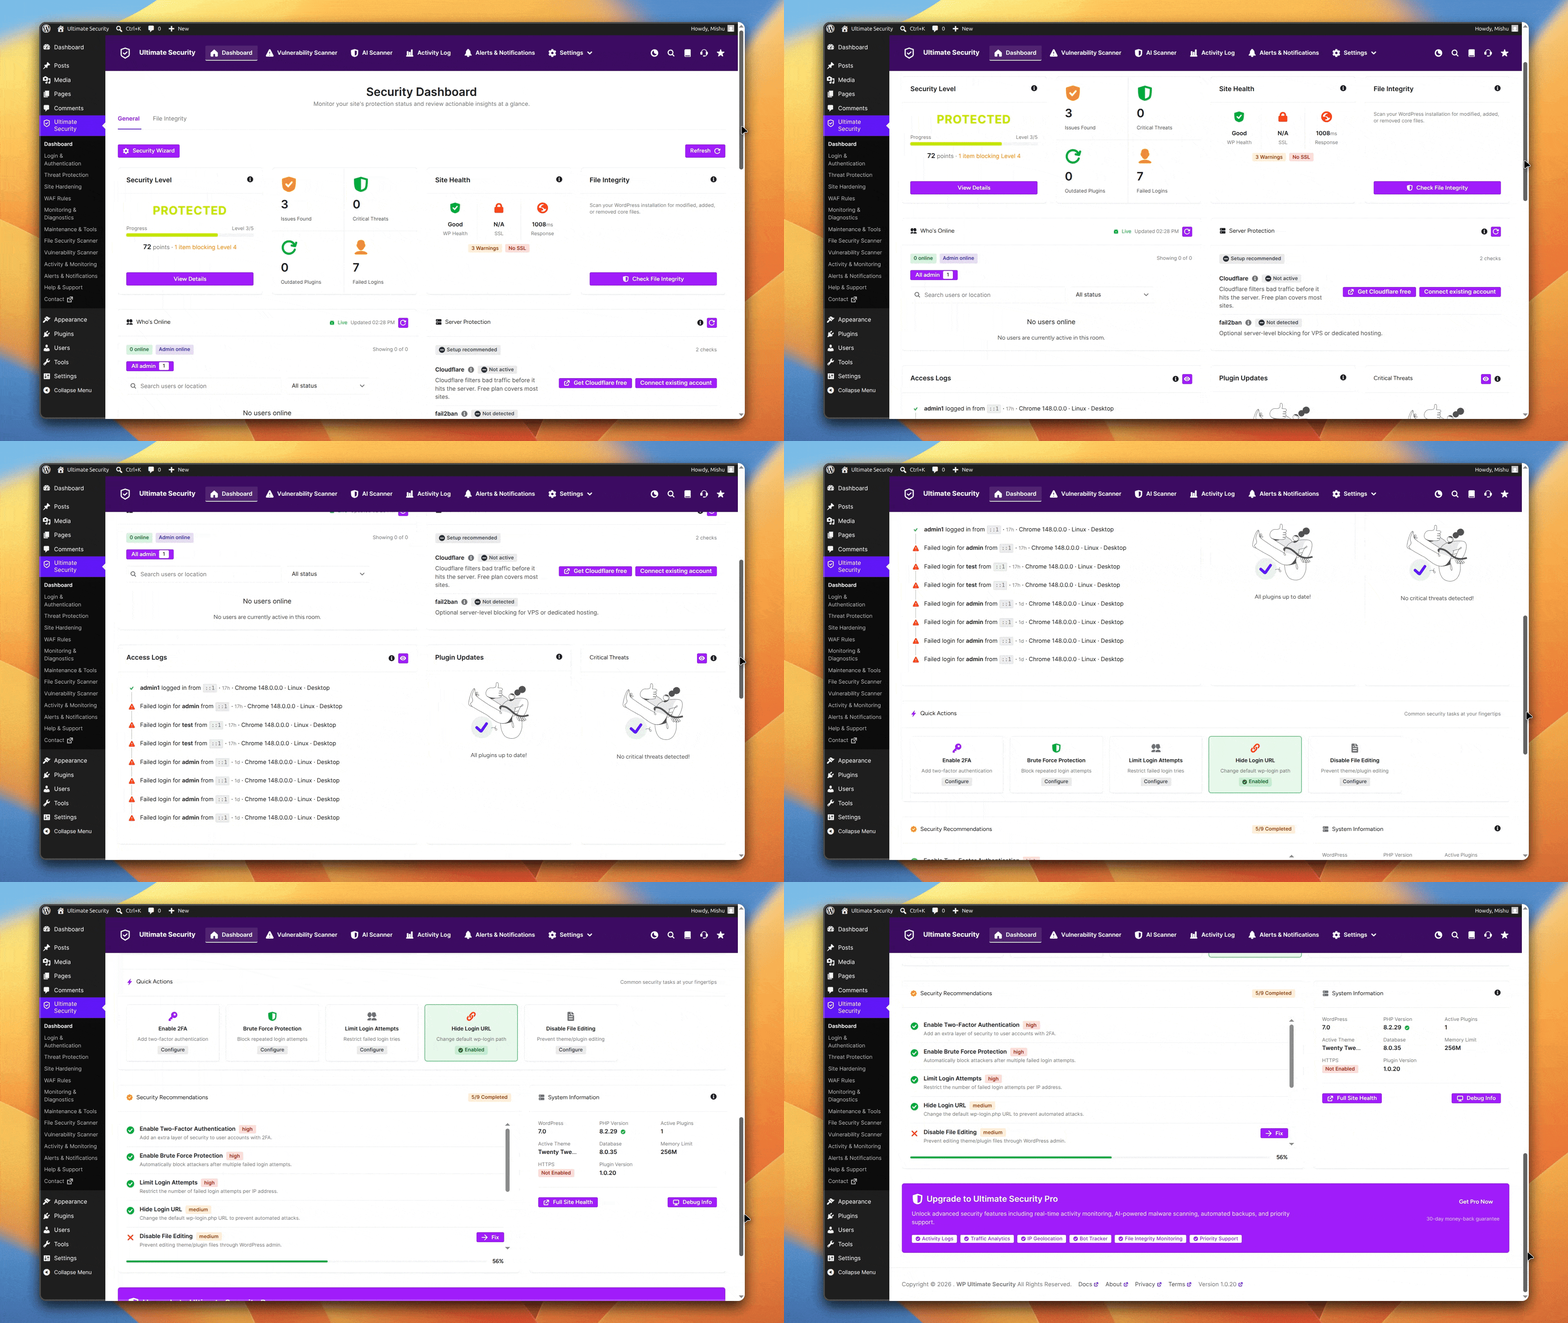
For a complete walkthrough of the configuration options, read the Ultimate Security documentation and setup guide.
Note that if you have not installed the Ultimate Security Plugin on your website to secure WordPress login entirely, visit our Installation documentation to get started for free.
How to Secure Your WordPress Login Page
Your login page is the front door to your entire site. So the WordPress security best practices start from here. It is also the single most attacked surface in WordPress. Bots run thousands of password attempts per hour against the default login URL. Most sites leave it completely unprotected.
Use Strong Passwords at Every Access Point
WordPress login security is not just about your WordPress dashboard password. Every access point that can reach your site is a potential entry point. Most sites lose accounts not because someone cracked a complex password but because a user set a weak one in the first place, and nothing stopped them.
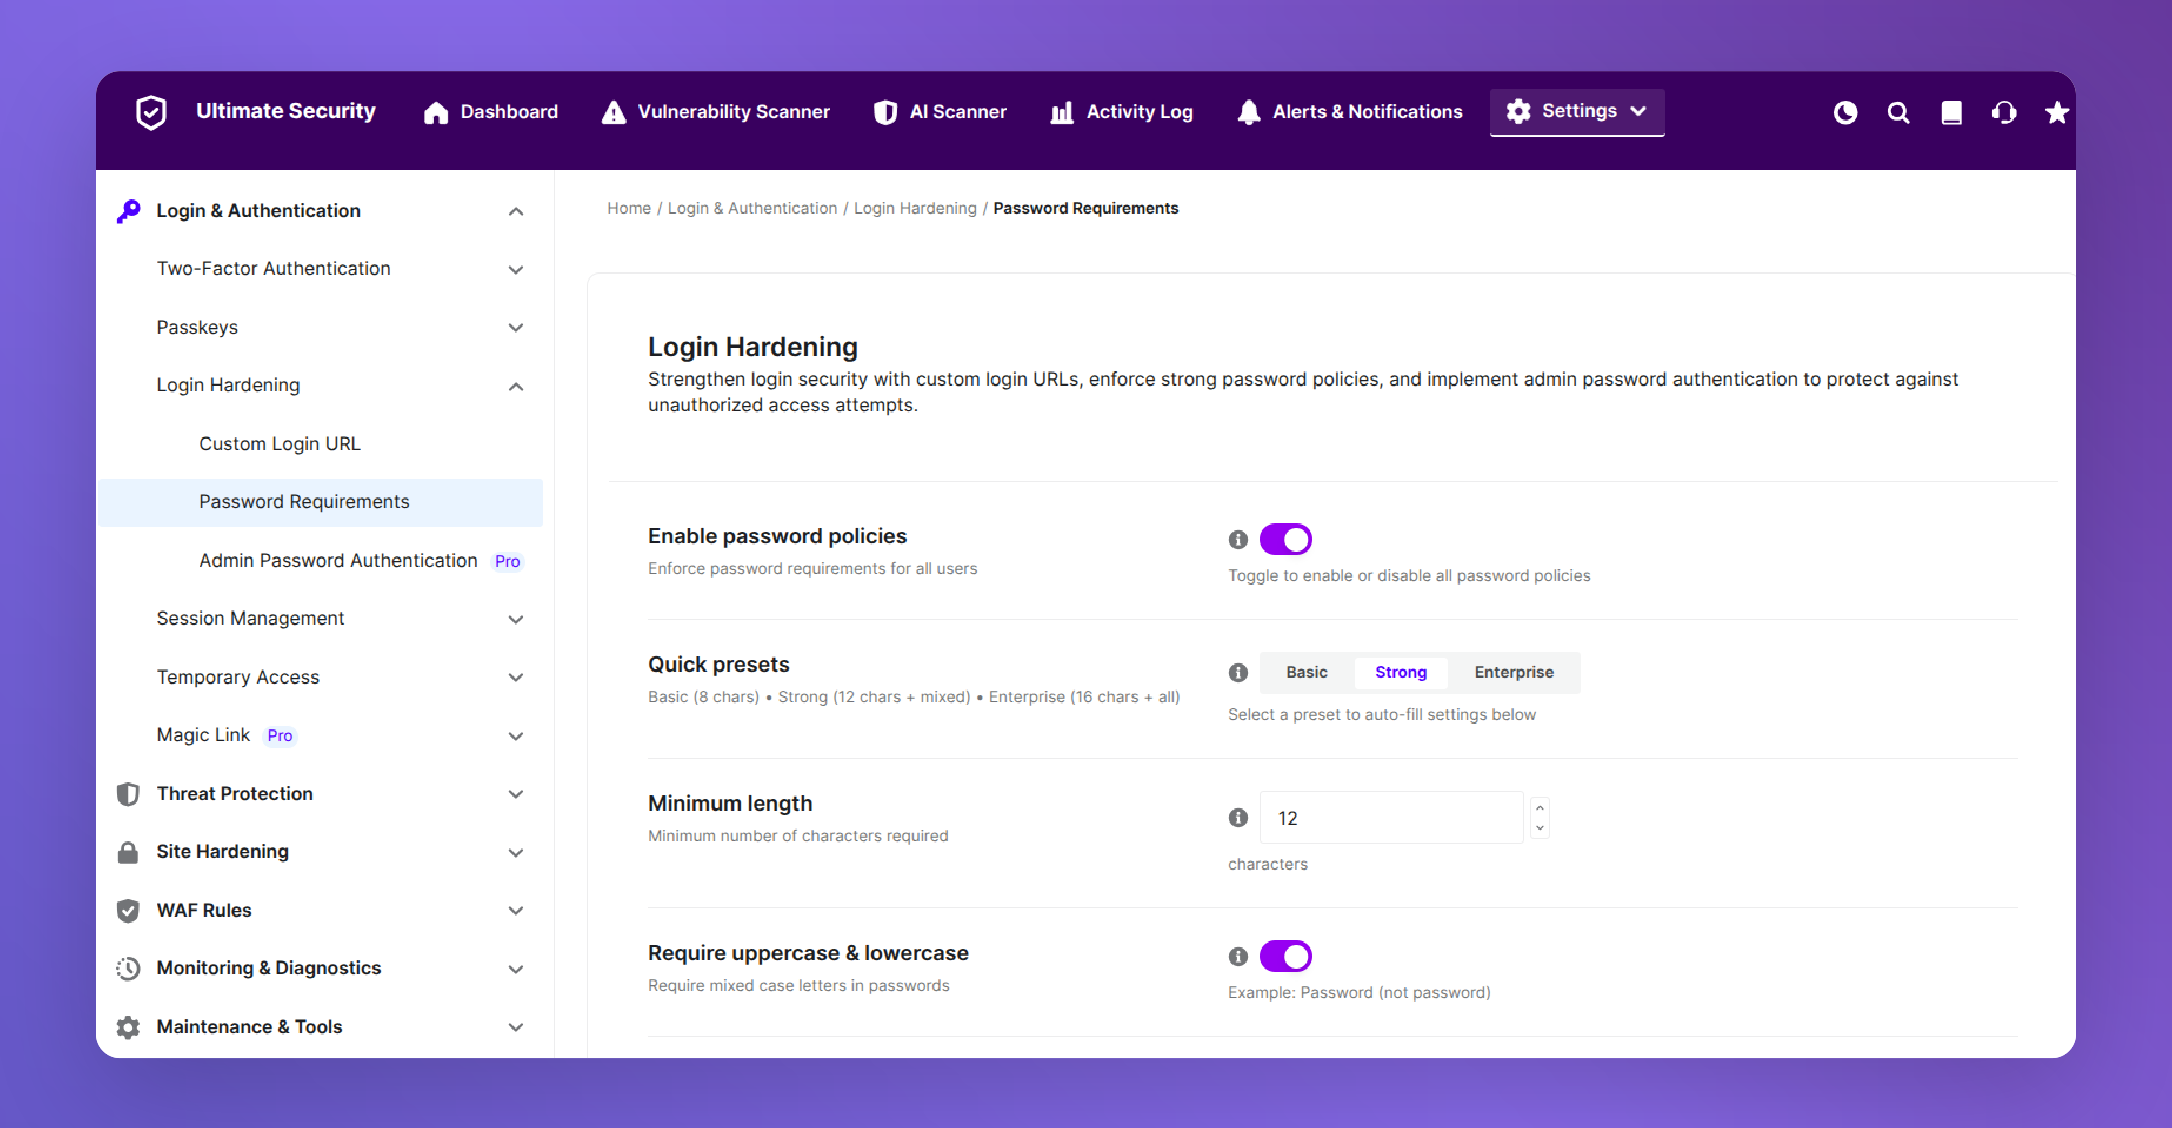
Ultimate Security Password rules let you define exactly what counts as an acceptable password on your site and enforce those rules automatically for every user on every account.
Remove the Default Admin Username
If your WordPress username is admin, you have already done half of an attacker’s job. The username “admin” is the first thing every brute force tool tries.
The fix is simple: create a new administrator account with a different username, transfer all your existing content to that account, and then delete the old admin account. This takes less than five minutes and meaningfully reduces your exposure.
Change Your WordPress Login URL
Every bot on the internet knows that WordPress login pages sit at /wp-login.php or /wp-admin. Moving your login page to a custom URL removes it from the automated attack surface entirely.
With a custom login URL, you can set a private entrance URL in minutes. It lets you choose what happens when someone tries the old default URL. By default it returns a 404 “Page Not Found” error, so bots get nothing.
Before you change your login URL:
- Bookmark your new URL or write it down
- Save the Plugin Deactivation URL from Settings > More > Extra
- Test the new URL in an incognito window before logging out
- If you ever get locked out, you can deactivate the plugin via FTP or the deactivation URL
Read more on how to protect WordPress login page from Brute force attacks.
What is Two-Factor Authentication and Why Your WordPress Site Needs It
Two-factor authentication (2FA) adds a second verification step after the password. Even if someone has your correct password, whether they cracked it, phished it, or found it in a data breach. They still cannot get into your site without the second factor. For WordPress admin security, 2FA is mandatory. It is the single most effective protection against credential-based attacks.
How Two-Factor Authentication Works
When you log in, after entering your password, you are asked for a second piece of information. The most common and secure method is a time-based one-time password (TOTP) generated by an authenticator app like Google Authenticator or Authy. The code changes every 30 seconds and is tied to your specific device.
Setting Up 2FA in WordPress
In your WordPress dashboard, go to Ultimate Security → Login & Authentication → Authentication Apps.
- Toggle the Authenticator Applications switch to ON
- Under Enable for Roles, select which user roles must use this method
After setting up the 2FA, you need to configure the setup process from the user’s profile. Start with Administrators and Editors at a minimum. You can decide on Contributors and Subscribers based on what level of access they have on your site.
Enforce 2FA Across All Admin and Editor Roles
Enabling 2FA on your own account is a start. But if any editor or co-admin on your site does not have it enabled, your site is still exposed through their credentials. Set 2FA as a requirement for every user role that can publish, edit, or install anything. Most security plugins allow you to enforce this by role.
Read more: How to block bad bots using Ultimate Security
Session Management: Control Who Is Logged In and When
Once a user is authenticated, the next question is: what happens to that session? Can they log in from five devices at once? What if they leave their computer unattended at a coffee shop?
Ultimate Security’s Session Management settings give you granular control over every active login on your site.
Cookie Hardening
When a user logs in, WordPress places a cookie in their browser to remember them. If an attacker steals that cookie, they can log in without the need for a password. Cookie hardening closes off the most common theft routes:
Session Binding
Session Binding links each login to the specific device and browser that created it. If a hacker steals a session token and tries to use it from a different device, the system detects the mismatch and blocks them immediately.
Concurrent Session Limits
These settings control how many devices a single account can be logged in from at the same time
How to Lock Down Your WordPress Admin Area
Securing the login page keeps attackers out. Securing the admin area limits the damage if they ever do get in.
Restrict wp-admin Access by IP Address
If you manage your site from a consistent location, your home, your office, or a small set of locations, you can whitelist those specific IP addresses and block everyone else from reaching wp-admin entirely.
This is configured through your (.htaccess) file or your hosting control panel firewall. For most beginners, your hosting provider’s firewall interface is the easiest place to set this up.
Note: this only works reliably if you have a static IP address. If your IP changes frequently (common on mobile or home connections), this can lock you out. In that case, skip this step or use a VPN with a consistent IP.
Disable File Editing in the Dashboard
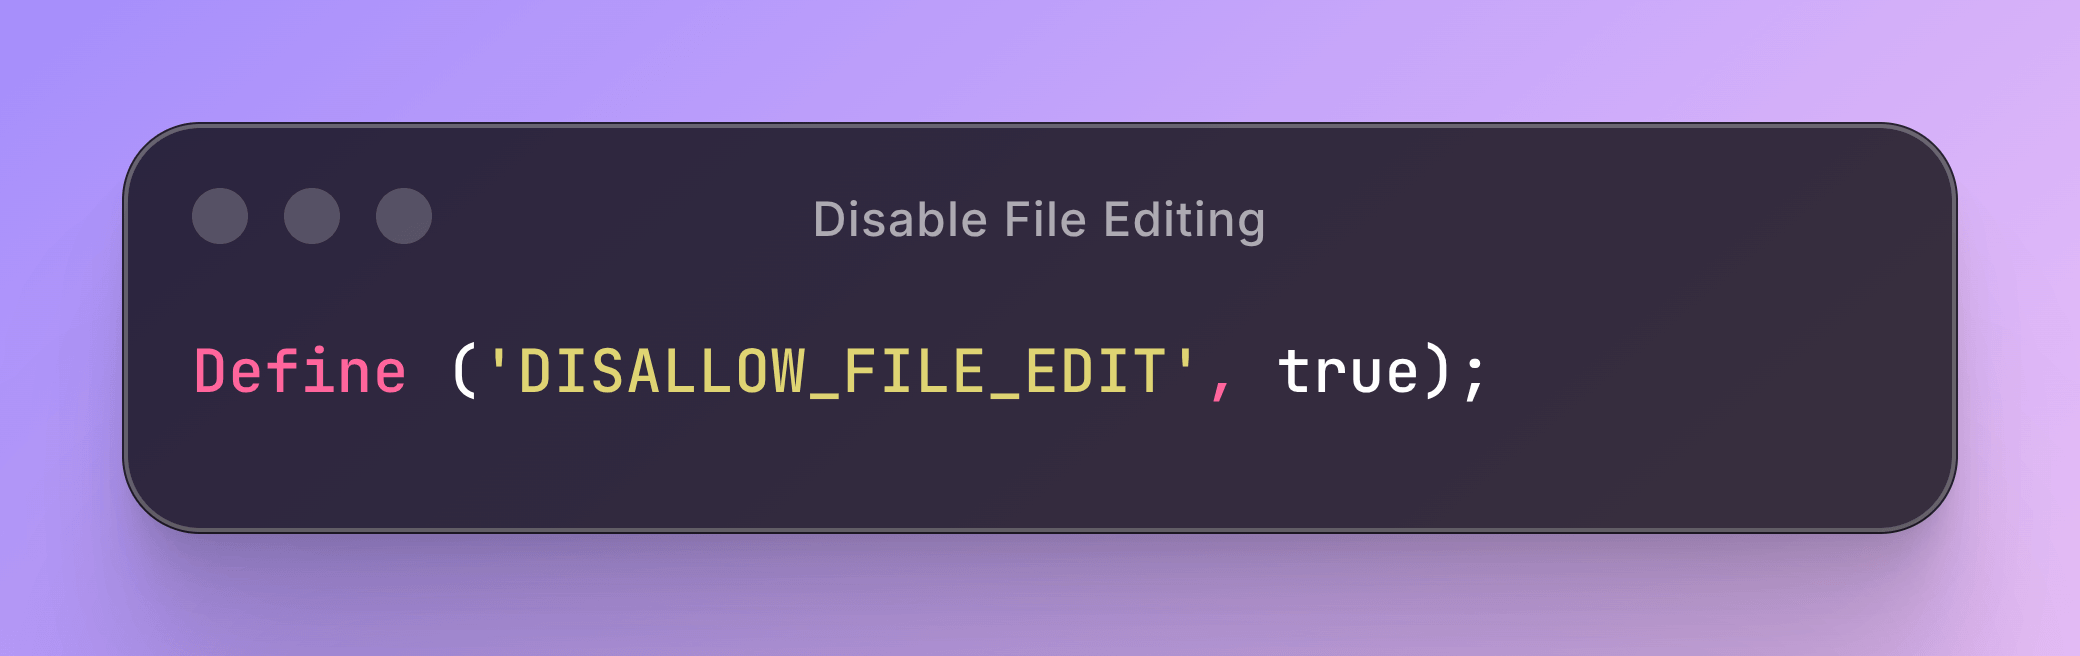
By default, WordPress includes a code editor inside the dashboard that lets you edit plugin and theme files directly. This is convenient and a serious security risk. If an attacker gains dashboard access, they can inject malicious code into your theme files in seconds.
Disable it by adding this single line to your wp-config.php file:
Snippet
Define ('DISALLOW_FILE_EDIT', true);One line. Eliminates an entire category of potential damage.
Apply User Roles Correctly
WordPress has five built-in user roles, each with different levels of access. The most common mistake is assigning Administrator access to people who only need Author or Editor access.
| Role | What They Can Do |
|---|---|
| Administrator | Full control, installs plugins, manages users, edits files |
| Editor | Publishes and manages all content, including others’ posts |
| Author | Writes and publishes their own posts only |
| Contributor | Writes posts but needs approval to publish |
| Subscriber | Reads content, manages their own profile only |
Give people the minimum access required for what they need to do. A freelance writer needs Author access, not Administrator. An editorial assistant probably needs Contributor. Audit your user list periodically and remove accounts that are no longer active.
How to Secure Your WordPress Database
Your database holds everything: posts, user credentials, plugin settings, and customer orders. If an attacker gets in, they can create new admin accounts, extract all your data, or wipe your site entirely. Database security is one of the most overlooked areas of WordPress hardening.
Change the Default Database Table Prefix
By default, every WordPress database table uses the prefix wp_. Every automated SQL injection tool in the world knows this and targets it specifically. Changing it to something random like xk92_ makes these automated attacks significantly less effective. Most security plugins, including Ultimate Security, include a table prefix changer that handles this safely.
Do this at installation if possible. Changing it on a live site carries some risk. So, always take a full backup first.
Minimize Database User Permissions
Your WordPress database user only needs specific permissions to do its job. It absolutely does not need DROP, ALTER, FILE, or GRANT permissions. Removing these limits the damage an attacker can do even if they find a SQL injection vulnerability.
Secure wp-config.php
The wp-config.php file contains your database credentials and secret keys. Protect it by:
- Moving it above your site’s public root directory (one level up from public_html or www)
- Setting file permissions to 600 (only your server user can read/write it)
- Making sure WP_DEBUG is set to false on your live site: define(‘WP_DEBUG’, false);
Rotate Your WordPress Security Keys and Salts
WordPress security keys (also called salts) are cryptographic strings stored in wp-config.php that secure authentication cookies and password encryption. If these keys are compromised, for example, after a breach or a staff change, rotating them immediately invalidates all active sessions across your entire site.
Ultimate Security’s security keys feature takes this a step further by turning key rotation into an automated, manageable process rather than a manual wp-config.php edit.
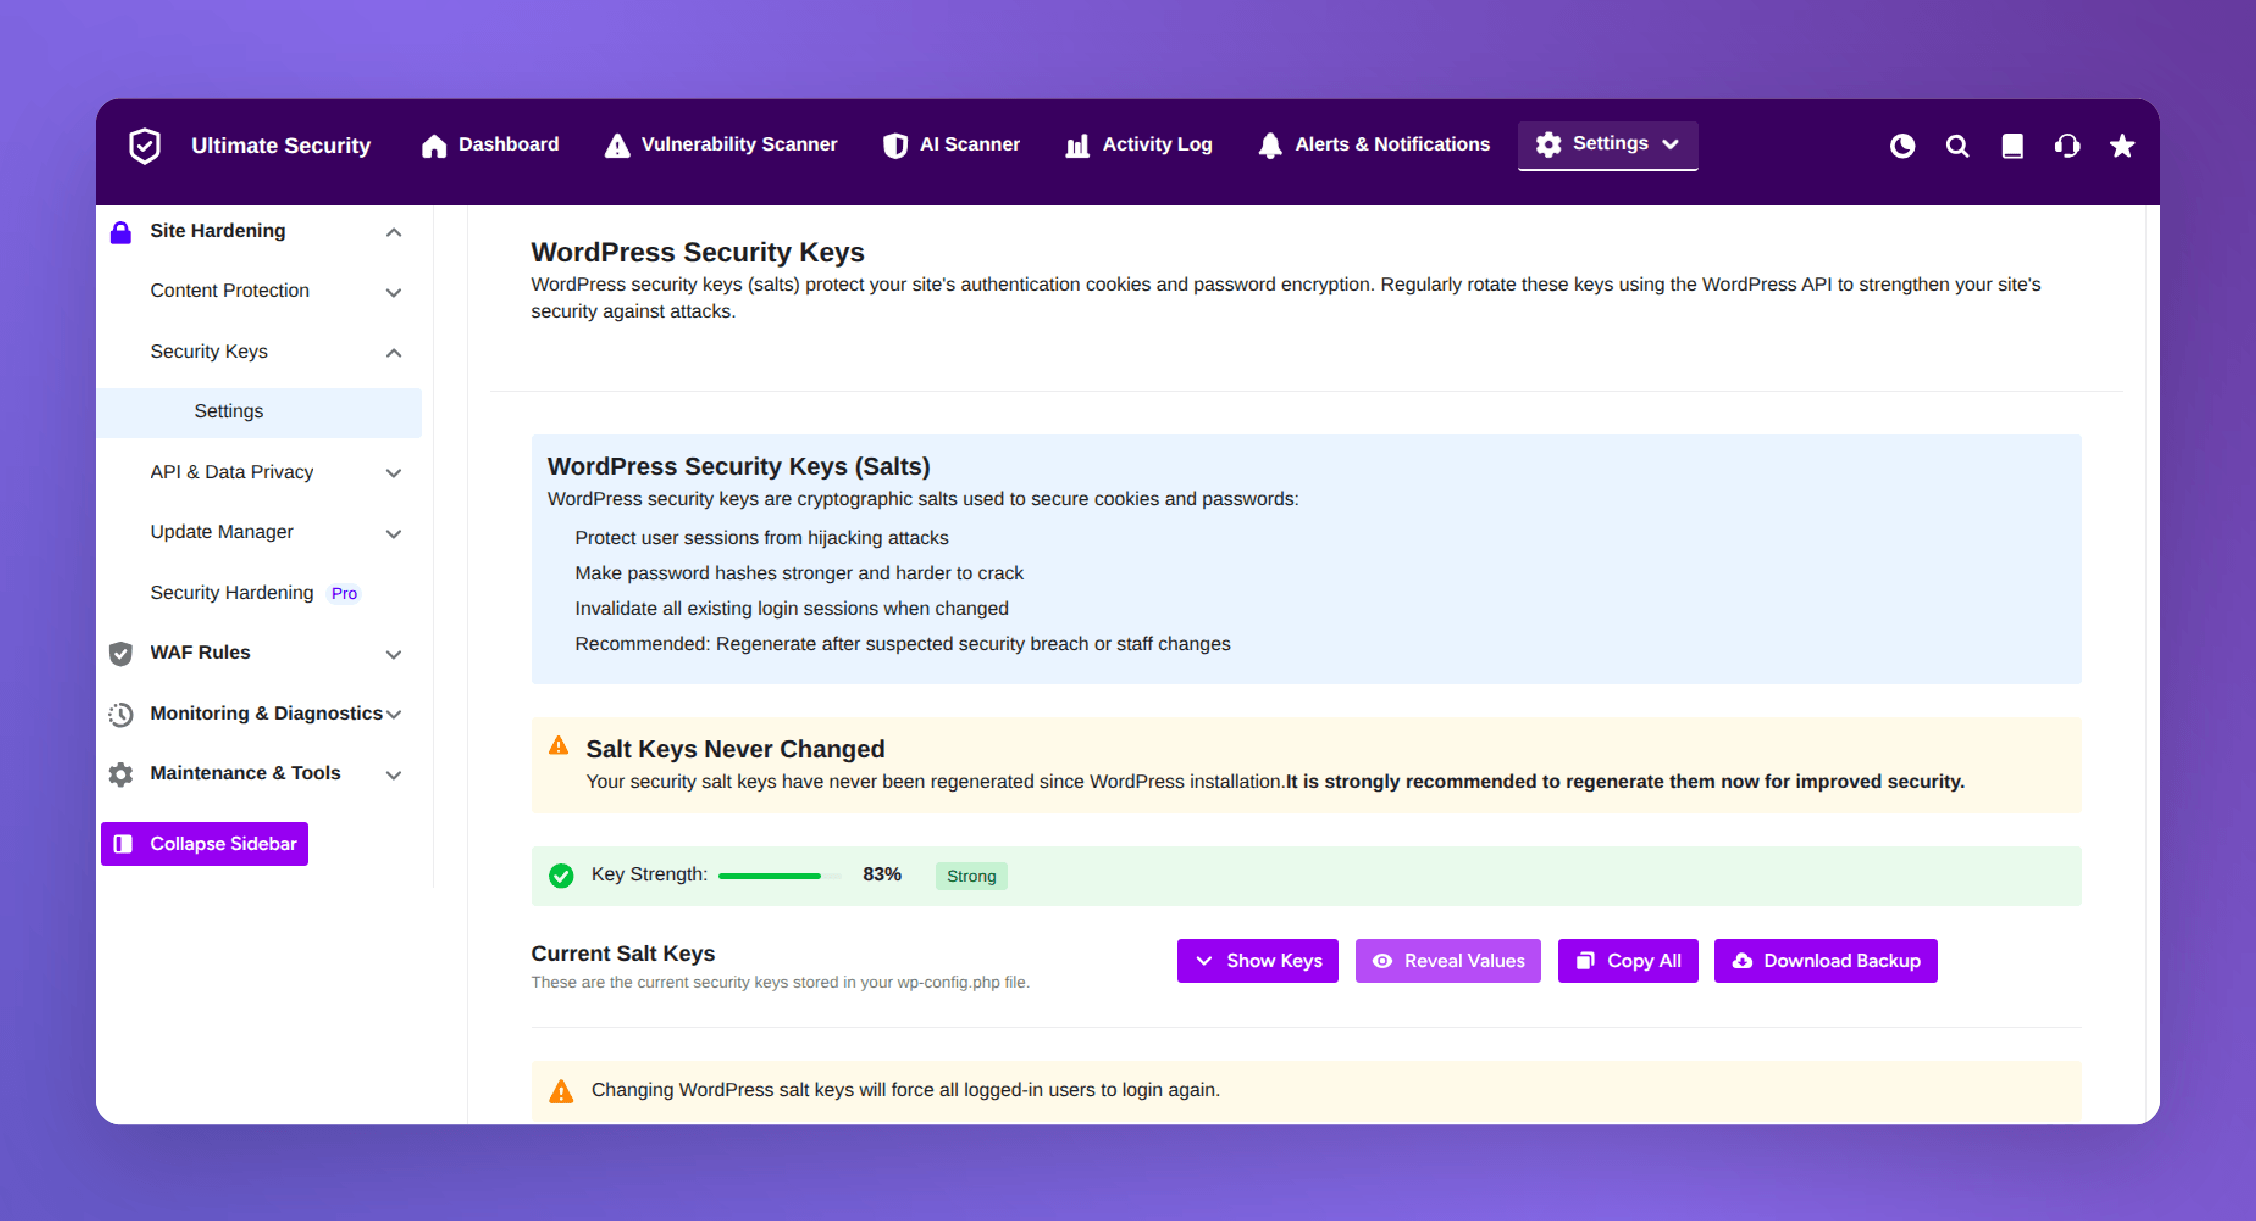
Security experts recommend rotating salt keys every 3 to 6 months as a standard practice and immediately after any suspected breach, when removing admin access from a former employee, or after any significant staff change.
Web Application Firewall: Filtering Threats Before They Reach WordPress
A Web Application Firewall (WAF) sits between your site and incoming traffic, inspecting requests and blocking malicious ones before they can reach WordPress. It’s one of the most effective layers of protection you can add.
Connecting Ultimate Security to Cloudflare WAF
Cloudflare WAF Setup allows the plugin to manage your Cloudflare security zones and deploy protective firewall rules directly from your WordPress dashboard without needing to navigate Cloudflare’s interface manually.
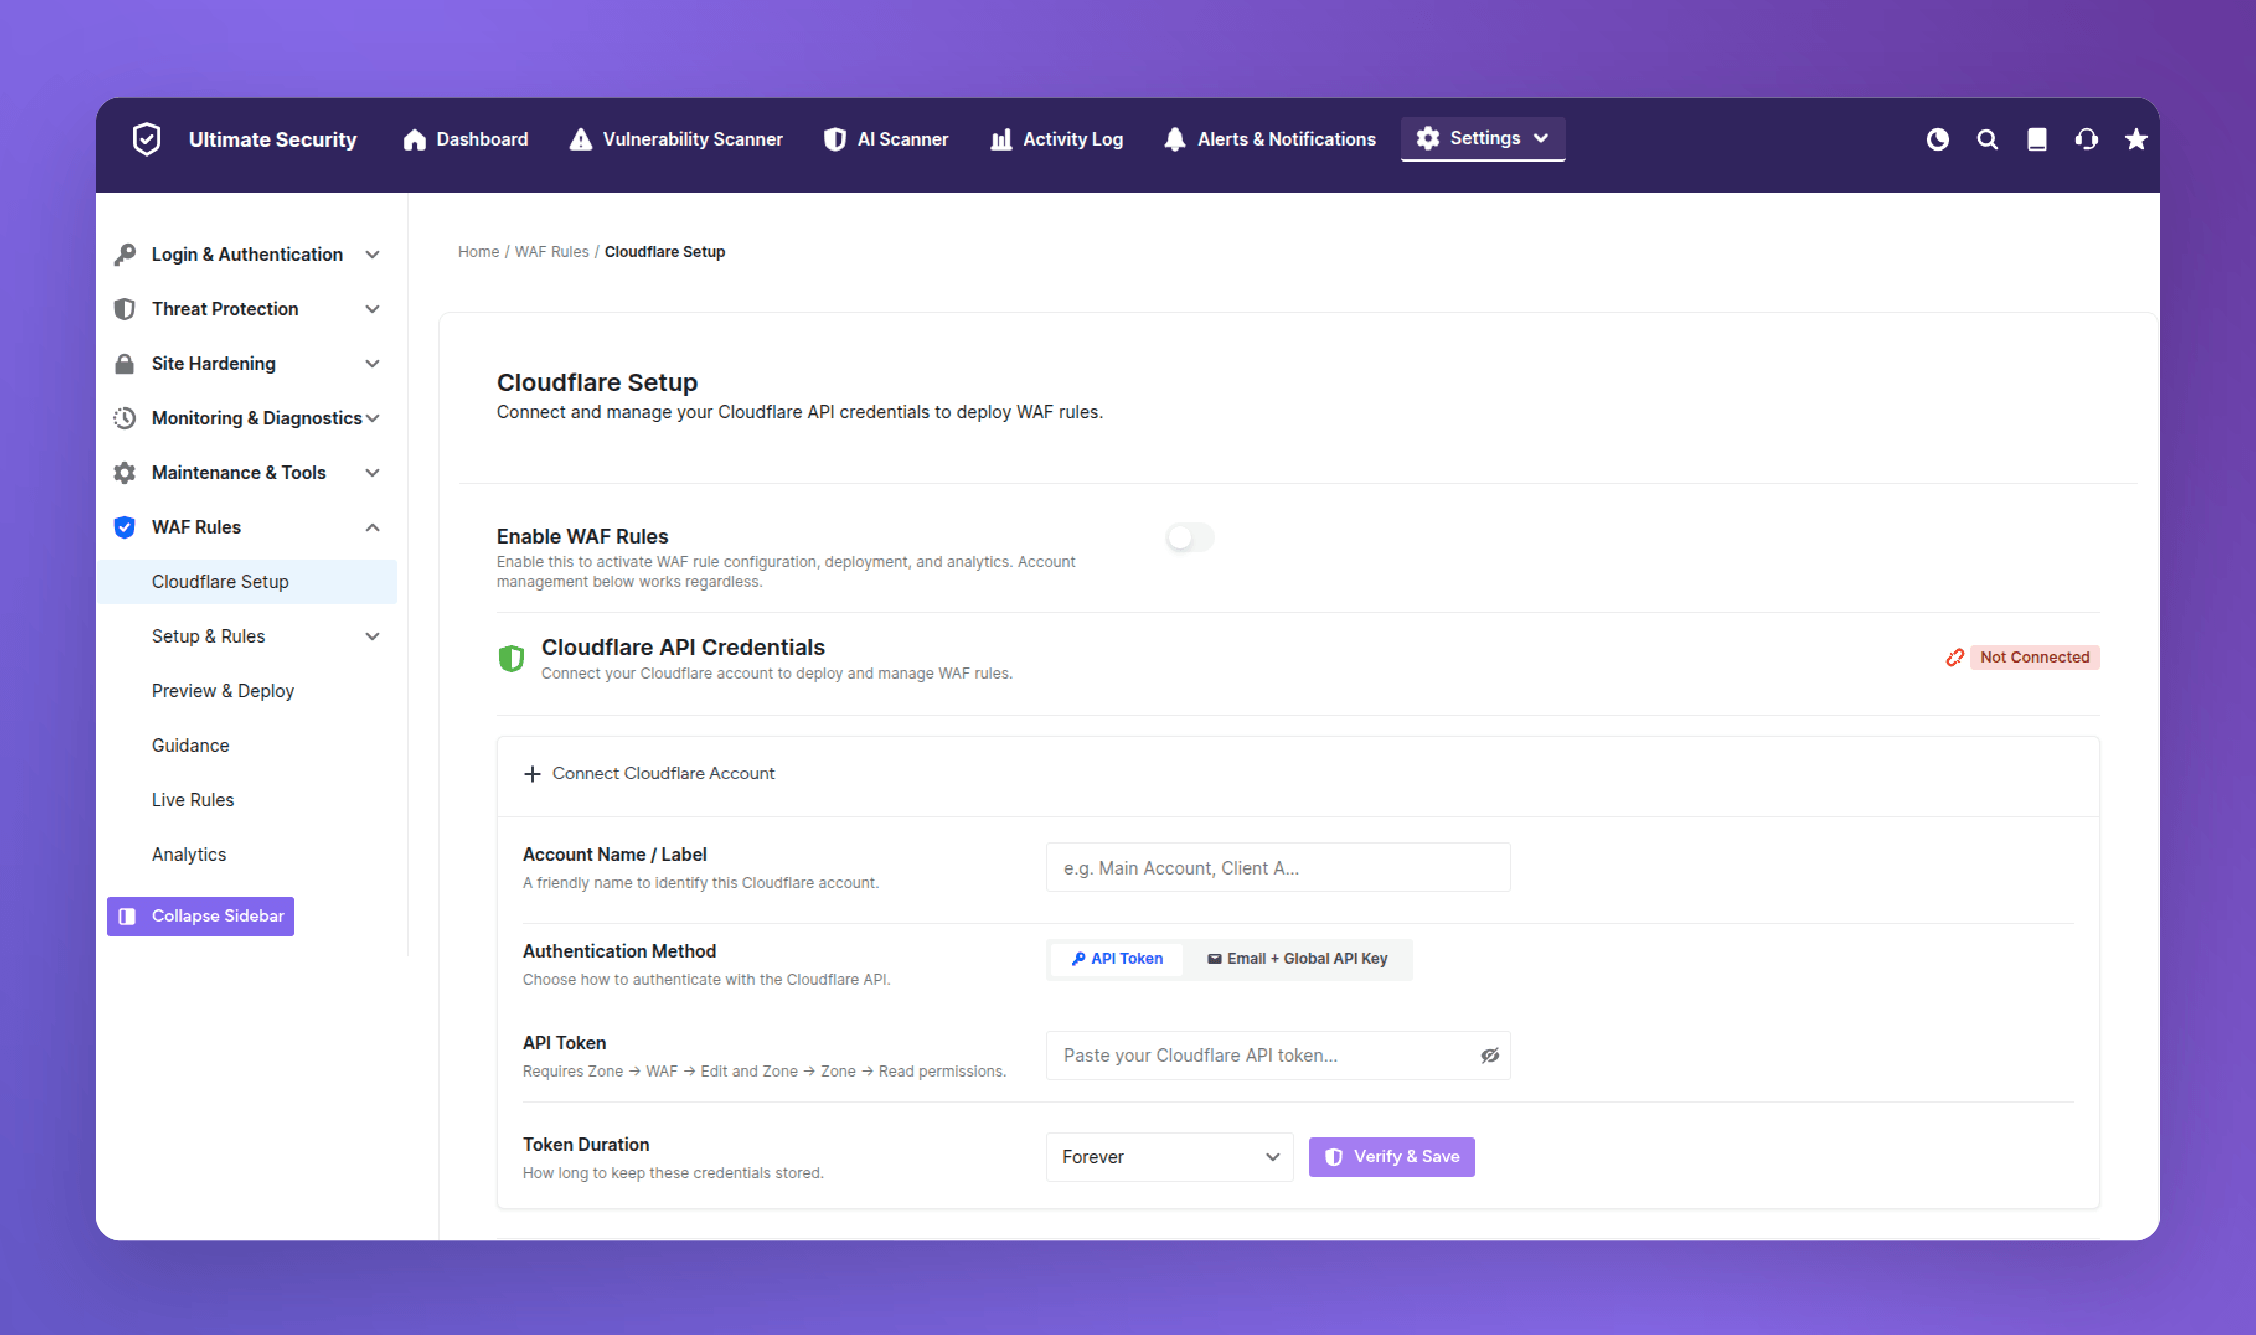
To connect:
- Toggle Enable WAF Rules to ON in the plugin settings
- Enter a friendly name to identify this connection (helpful if you manage multiple Cloudflare accounts)
- Choose your authentication method:
- API Token (Recommended): Uses a scoped token with limited permissions — safer than a global key
- Email + Global API Key: Uses your Cloudflare login credentials directly
- Create an API Token with Zone → WAF → Edit and Zone → Zone → Read permissions (recommended), or use your Email + Global API key.
- Set how long the plugin should store your credentials
- Click Verify & Save and a successful connection changes the status badge from red “Not Connected” to green “Connected.”
To create an API Token in Cloudflare:
- Log into your Cloudflare Dashboard
- Go to My Profile → API Tokens
- Create a token using the “Edit Zone DNS” template, or build a custom token with WAF Edit and Zone Read permissions
- Copy the token and paste it into Ultimate Security’s settings
Security tip: Never share your Global API Key. A scoped API Token gives the plugin only the access it needs.
Ultimate Security supports managing multiple Cloudflare accounts simultaneously, so you can switch between security zones without leaving your WordPress dashboard.
Keeping WordPress Updated and Backed Up
Updates and backups are the three things that separate a site you can recover from a site you cannot. None of them are complicated. All of them are easy to skip. That is the entire problem.
Keep Everything Updated
| What to Update | How Often |
|---|---|
| WordPress core | Immediately for security releases; otherwise monthly |
| Plugins | Weekly check; immediately for any security patch |
| Themes | Monthly |
Never install nulled or pirated plugins or themes. These are commercial plugins distributed illegally with the licensing checks removed, but in almost all cases, they have also been modified to include backdoors. The vulnerability is deliberate. Installing a nulled plugin is directly handing attackers a key to your site.
Back Up the Right Way: The 3-2-1 Rule
A backup you have never tested is not a backup. Follow the 3-2-1 rule:
- 3 copies of your site
- 2 different storage types (for example, your server and an external drive)
- 1 stored offsite, not on your hosting server
Schedule automated backups with a reliable plugin. After setting up your backup solution, run a test restore. Pull your most recent backup, restore it to a staging environment, and confirm that it works. This is the step almost everyone skips. It is also the step that determines whether your backup actually saves you when you need it.
What to Do If Your WordPress Site Gets Hacked
Even with every step in this guide completed, breaches can still happen. A zero-day vulnerability, a compromised plugin author’s account, a team member reusing a password that leaked in an unrelated breach. Some scenarios are outside your direct control.
What you do in the first hour after discovering a compromise matters enormously.
Step 1: Contain First, Clean Second
Before anything else, limit the damage.
- Put your site in maintenance mode or take it offline entirely
- Do not log out of your current session, you may lose dashboard access entirely if the attackers have changed your credentials
- Do not install new plugins while the site is still compromised
Step 2: Change Every Password Immediately
| Access Point | Action |
|---|---|
| All WordPress admin accounts | Change passwords immediately |
| Hosting control panel | Change immediately |
| FTP/SFTP credentials | Change immediately |
| Database password | Change and update wp-config.php |
| Email linked to the site | Change immediately |
Do all of these at once. If attackers have your hosting credentials, they can restore access even after you clean the site.
Step 3: Identify the Infection
Run scans from two different sources. If your dashboard is accessible, run a full scan through Ultimate Security’s malware scanner. Also run an external scan through sitecheck.sucuri.net , this does not require any login and scans your site from the outside, the same way a visitor would see it.
Step 4: Remove the Malware
If you have a clean backup from before the compromise, restoring it is almost always faster and more reliable than trying to manually clean every infected file.
Step 5: Harden After Cleanup
Cleaning the infection without fixing the entry point means you will be infected again, sometimes within hours. After cleanup:
- Regenerate security keys and salts. Ultimate Security plugin lets you easily regenerate them
- Audit all user accounts and delete anything unfamiliar
- Update every plugin, theme, and WordPress core to current versions
- Verify that file permissions are correctly set
- Re-enable your WAF if it was disabled during the incident
- Review your activity log for the timeline of the breach
Step 6: Request a Google Review If Blacklisted
If Google has flagged your site, go to Google Search Console, navigate to Security Issues, and submit a Review Request. Be specific about what you found and what you fixed. Google typically responds within 72 hours.
Frequently Asked Questions
What is the single most important step on a WordPress security checklist?
Keeping plugins and themes updated. The majority of successful WordPress attacks exploit known vulnerabilities in outdated software, vulnerabilities that already have published patches. Everything else in this guide builds on that foundation. If you only do one thing, do that.
Do I need a security plugin if I already use Cloudflare?
Yes. Cloudflare filters traffic at the network level , it is exceptional at blocking DDoS attacks and filtering obvious bot traffic. A website security plugin for WordPress operates at the application layer, handling file integrity monitoring, malware scanning, and WordPress-specific login protection. They protect different things. You want both.
How often should I run a WordPress security audit?
Once a month for actively maintained sites. Check that all updates are applied, run a malware scan, audit your user accounts, and verify that your automated backups have been running successfully. A complete monthly audit takes less than 30 minutes.
Is WordPress secure by default?
The WordPress core software is reasonably well-maintained from a security perspective. But a default WordPress installation leaves several significant attack surfaces open: the default admin username, XML-RPC enabled, user enumeration possible through the REST API, and file editing accessible from the dashboard. This guide closes those gaps.
Can I recover my WordPress site after a hack without a backup?
Sometimes, but it is significantly harder and less certain. If the infection is isolated to a small number of files, manual cleanup via SFTP is possible. If the infection is widespread or includes the database, professional malware removal may be necessary. This is why having tested backups , particularly offsite backups following the 3-2-1 rule, is so important. A good backup makes recovery straightforward. The absence of one makes it genuinely difficult.
Does changing my WordPress login URL actually improve security?
Yes, in a practical sense. The default login path (/wp-login.php) is targeted by virtually every automated attack tool. Moving it to a custom URL does not make login impossible for attackers who specifically target your site, but it removes you from the path of the vast majority of automated scans that only check the default paths. It is a quick, easy step with real, measurable impact on the volume of login-related attacks against your site.
WordPress Security Is a System, Not a One-Time Fix
The truth is that no matter how many locks you put on your door, a break-in can still happen. Good security is not about being completely bulletproof. It is about closing as many open windows as possible and making it too hard for hackers to target your site.
Truly following WordPress security best practices means looking at your website as a whole system. Your login pages, your database settings, and your firewalls all need to work together to slow down and stop malicious scripts. Automated bots will never stop looking for easy targets. However, when you move away from basic advice and actually harden your settings, you drastically shift the odds in your favor. You build a site that can withstand modern attacks. If you want to make this setup easy and manage your login security, user sessions, and firewalls from one single place, give Ultimate Security a try.
Start with step one today, and make your website much safer.