Real time updates for your WordPress site’s security! How does that sound? That’s exactly what you get with Ultimate Security plugin’s Dashboard. You will get real-time security insights from your website.
Table of Contents
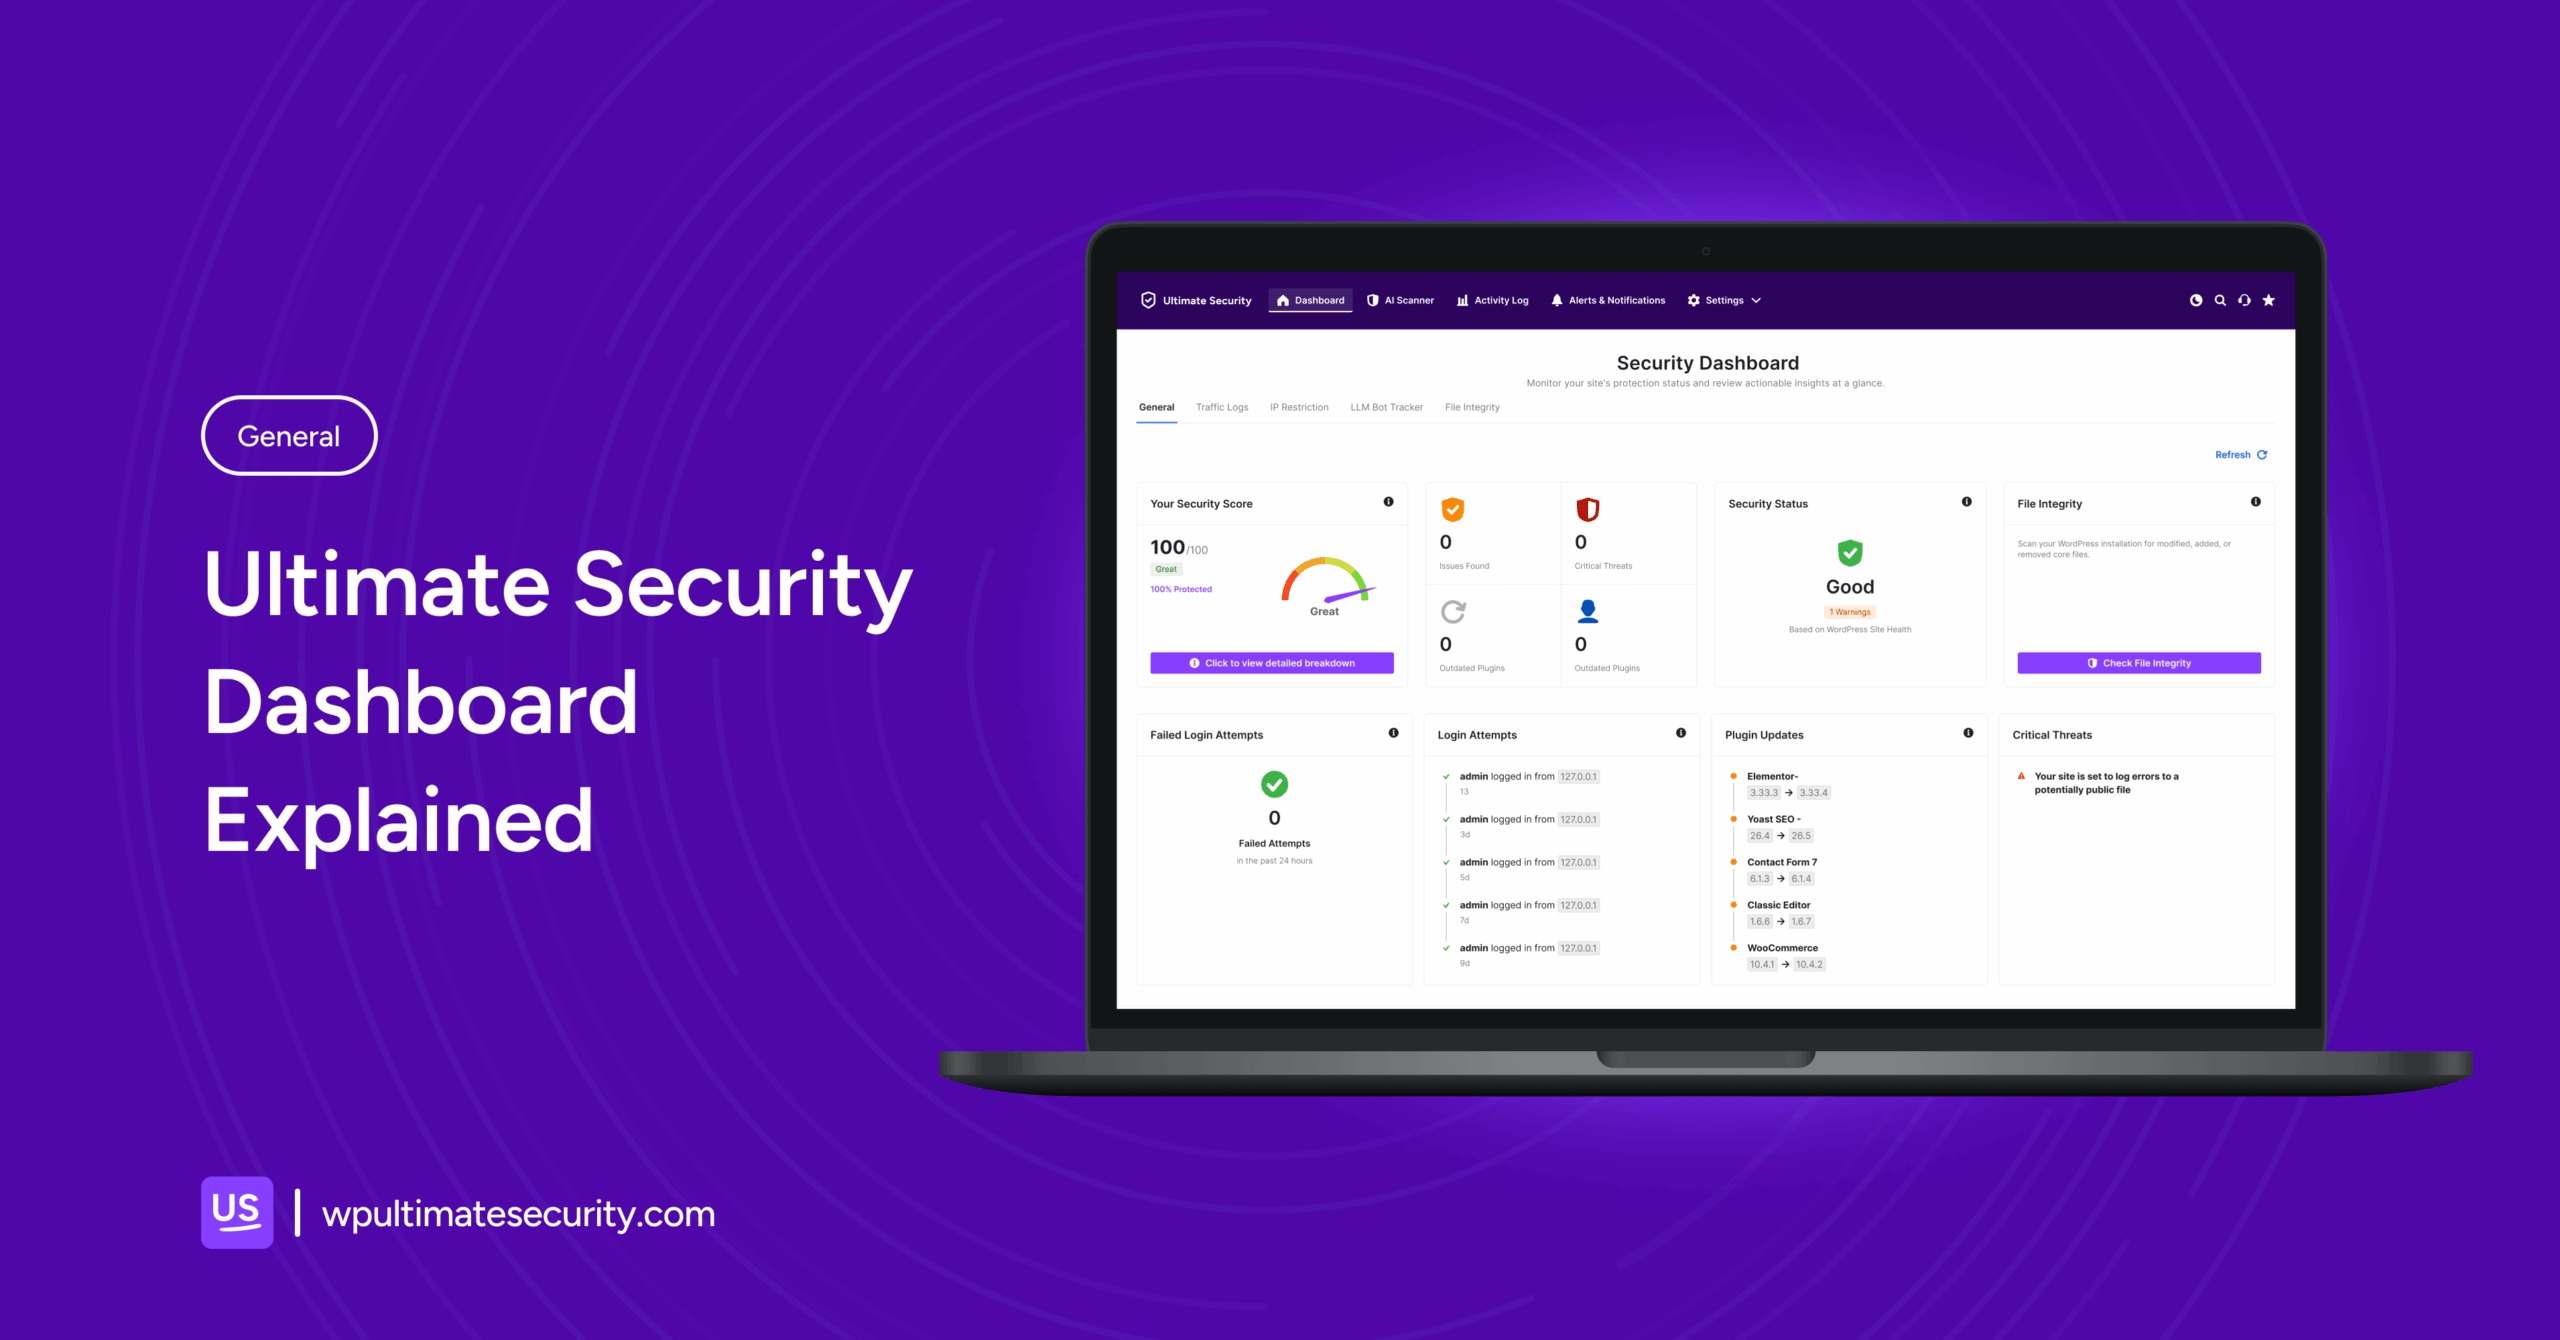
What is Ultimate Security’s “Dashboard”?
Ultimate Security’s dashboard shows you everything happening on your website’s security. Instead of checking ten different settings pages, the dashboard pulls it all in one place. The dashboard displays security level, active threats, failed logins, file changes, and site health, etc.
First Look at the Dashboard
Once the plugin is active, you’ll spot a new menu item in your WordPress sidebar called Ultimate Security. Click on it, and you’re straight into the dashboard.

Two quick pop-ups appear at first:
- A friendly welcome message.
- An “emergency” notice appears, with a unique deactivation URL. Save this somewhere safe (bookmark it or screenshot it). If you ever lock yourself out by mistake, like enabling super-strict settings, this URL lets you turn the plugin off.
Security Wizard Set Up Protection
Before we start exploring the dashboard, there’s one thing you should do first. Mark Security Wizard at the top left of the dashboard, below the General and File Integrity tabs. Press it, and it will take you through a complete security setup.

What happens when you go through it:
Step 1: Welcome
This first screen introduces you to what the wizard is going to do. A quick overview of the four things that happen during the setup:
- Security Scan: Analyzes your current setup and finds potential vulnerabilities
- Security Profiles: Let you choose from Basic, Balanced, or Maximum protection levels
- Review Changes: Shows you every change before anything is applied to your site
- Undo Anytime: Reverts anything if you need
Step 2: Security Scan
The plugin immediately scans your entire WordPress site. When it’s done, you’ll see your Security Grade like letter grades (A, B, C), along with a breakdown of three things:
- Passed
- Warnings
- Critical
Below the grade, there’s a detailed table. Each row will give you a specific security check like SSL, password policies, and login settings, with a status of Passed, Warning, or Critical, plus a brief explanation of why.
Step 3: Choose Your Security Profile
Now you pick a protection level. There are three options:
Basic Protection: Best for beginners and small personal sites
This covers the essentials without affecting your site’s performance at all:
- Changes your login page URL to hide it from bots
- Sets a basic password policy — minimum 10 characters
- Limits failed login attempts and blocks repeat offenders
- Hides your WordPress version from public view
Balanced Security: Best for business sites and growing blogs
Everything in Basic, plus:
- Two-factor authentication via email
- Stricter brute force protection rules
- Security headers to block common browser-based attacks
Maximum Security: Best for sites that need enterprise-level protection
Everything in Balanced, plus:
- Mandatory 2FA for all administrators
- Advanced rate limiting to block scrapers and bots
- The full suite of security headers for maximum browser protection
Step 4: Review Changes
Before anything is applied, the wizard shows you exactly what’s about to change. You’ll see:
- Which profile did you selected
- How many settings will be modified
- A side-by-side comparison of your current settings vs the new settings
Take a moment to read through this. If something doesn’t look right, go back and choose a different profile. If everything looks good, click next to apply.
Nothing changes on your site until you approve it at this step.
Step 5: Setup Complete
Your site is now configured. The final screen shows you a confirmation of everything that was just applied on your site. When you’re done, click “Go to Dashboard” to exit the wizard and get back to the main screen.
Security Level
Right at the top-left of the dashboard sits the Your Security Level card. It gives you one clear number that sums up how protected your site really is.

You’ll see:
- A progress level score out of 5
- A label of security status Basic, Fair, Good
- A point metric of security
You will also find “view detailed” button that pops upwith:
- Your exact points and status are repeated at the top
- A list of the top recommendations based on your current setup
- Suggestions for other security features
- Existing security score breakdown
- Lastly, three types of security priority suggestions
Each recommendation usually links straight to the right settings page so you don’t have to hunt around.
Issue Counters
Right side of the security level, you will see a card. The four colorful boxes are warning lights on the dashboard. These are your priority counters. They show you where the risks are coming from.
Each one shows:
- Issues Found: This counts small-to-medium vulnerabilities.
- Critical Threats: This shows immediate, high-risk threats.
- Outdated Plugins: It shows how many of your installed plugins are running old versions.
- Failed Login Attempts: It tracks how many wrong password tries occurred recently.
Site Health
Next in the dashboard, there is the Site Health widget. In the middle right column, a card named Site Health indicates the foundations that keep your site secure and running smoothly.

You will see:
- WP Health: It checks your WordPress core setup, like your PHP version and server config.
- SSL Status: It simply checks whether your site has SSL installed or not
- Response Time: It measures how fast your site starts responding.
File Integrity
Every WordPress site has a set of core files. These files run your website. File integrity monitoring watches your WordPress core files, themes, and plugins and flags anything that has been added, changed, or deleted without your knowledge.

Hackers often sneak in by modifying a file or dropping something malicious. File integrity spots those changes early so you can investigate before anything happens.
The scan results summary shows:
- Modified: It means any files that have been changed
- Missing: It means that files that should be there but aren’t
- Unknown: It means that the files the plugin doesn’t recognize
- All: It means the total count of everything found
Below the summary is the File List. A table that shows each flagged file with these details:
- File Name: Which file triggered the alert
- Status: What type of change happened
- Risk: How serious the threat level is
- Size: How big the file is
Use the search bar to find a specific file quickly if the list is long.
At the bottom of the report, you have three options:
- Export Report: It downloads the scan results
- Rescan: It runs a fresh scan after you’ve fixed or deleted something
- Close: Go back to the main dashboard
One important thing to know:
Not every flagged file is a threat. Sometimes, a plugin or theme you installed makes legitimate changes to core files.
If you see unknown files in the list, then pay attention to them. If you don’t recognize where they came from, investigate before doing anything else. If they don’t belong, delete them.
Server Protection
This card is about server-level protection. It suggests two free tools you can add outside of WordPress:
- Cloudflare — A free service that blocks malicious traffic before it even reaches your server
- Fail2ban — A server-side tool that automatically bans IP addresses after too many failed login attempts
The Bottom Cards
As you scroll toward the bottom of the dashboard, you’ll find four other cards. These give you a more detailed look at specific security activity on your site.

- Failed Login Attempts: This number shows how many times incorrect login credentials were entered in the last 24 hours. One or two is nothing to worry about. But if you’re seeing a lot of failed attempts, that’s a sign bots are actively targeting your login page.
- Login Attempts: It shows you a full list of recent login activity. Both successful and failed logins are recorded. Each record includes the exact time and the IP address used. This information is useful for spotting patterns. For example, if you see 50 failed attempts from the same IP address, it means a bot is running a brute-force attack on your site.
- Plugin Updates: This card shows you which plugins on your site have updates available. Keeping plugins updated is one of the simplest things you can do for your site’s security. Outdated plugins are the common way hackers get in. If you see anything listed here, update it.
- Critical Threats: This card shows any high-risk security threats currently detected on your site. If anything shows up here, it needs to be fixed.
These four cards work together to give you a clear understanding of what’s happening. So make sure you check this section frequently.
Quick Actions
This section is built to get protected fast without looking for initial settings pages. The quick actions section puts the five most important security tasks in front of you. Each one has a configure button that takes you directly to that feature’s settings.

They do:
- Enable 2FA: 2FA means two-factor authentication. When you turn this on, logging in to your site requires two steps. First, your password, and second, a verification code. So even if someone figures out your password, they still can’t get in without that second code. It’s one of the most effective login protections you can add. Click configure to set it up.
Want a detailed walkthrough of setting up 2FA? Check out our full guide here.
- Brute Force Protection: Often bots try different password combinations on login pages. Sometimes they try thousands of times per hour. This brute force protection option stops that. Once enabled, when someone crosses the limit you set, they get locked out automatically.
- Limit Login Attempts: It makes harder on how many times someone can enter wrong credentials before they’re blocked from trying again. Brute Force Protection watches for attack patterns while with limit login attempts. Altogether, these two make the login page much harder to break into.
- Hide Login URL: By default, every WordPress site uses the same login page address (wp-login. php. or wp-admin), and everybody knows it. So changing it to something custom means attackers can’t even find your login page. This way, you can reduce the brute force attack by half.
- Disable File Editing: WordPress has a built-in code editor that lets you edit theme and plugin files directly from the dashboard. This is convenient but also a serious security risk. If someone ever gets admin access, they can use that editor to inject malicious code into your site. But disabling file editing removes that option. This setting does the same for you.
Each of these five actions makes a real difference on its own. Together, they provide powerful security for WordPress.
Security Recommendations
The Security Recommendations section checks your current security setup and display you what security is missing on your site. It audits your site’s security settings. Each recommendation shows up as an individual item. Next to each recommendation, there is a Fix button that will take you straight to the setting page.

As you work through the list and complete each fix, two things happen:
- The progress bar updates to show how far along you are
- The completion count increases, so you can see how many recommendations you’ve fixed
The more items you fix, the higher your Security Score grows. So this section and your score are directly connected.
System Information
This card gives you a quick overview of your WordPress environment.
Here’s what each item shows:
- WordPress: The version of WordPress your site is currently running
- PHP Version: The version of PHP your server uses.
- Active Plugins: How many plugins are currently active on your site
- Active Theme: The theme your site is running right now
- Database: Your database version
- Memory Limit: How much server memory WordPress is allowed to use
- HTTPS: Whether your site is running on a secure connection.
- Plugin Version: The version of Ultimate Security you have installed
At the bottom of the card, there are two buttons:
- Full Site Health: It will take you to a detailed WordPress health report page
- Debug Info: It will take you to the site health information from the plugin
Conclusion
The Ultimate Security dashboard is full of numbers. Every section on it is telling you something specific about your site and, more importantly, what to do about it. Start with your Security Level. Fix the top recommendations one by one. By the time you’ve worked through the list, your site will be in a completely different shape than when you started. Your site is worth protecting. The dashboard makes it easy to do exactly that